After filming on 7ds and 5ds for a few years, I have realised that there is not much latitude with regards to perfect skin tones. With these DSLRs it is really easy to blow the highlights and lose some detail in the face. It can also be tricky to get the correct white balance, particularly in mixed light conditions, or where the face is small in frame, and therefore hard to judge manually. A decent monitor can help with all of this, but it still means that a lot of guess work is being done. There are of course times when you want under exposed skin tones, or a very cold, blue looking light certain scenes in a dramatic context, but for a basic sit down interview, you want correctly exposed and corectly white balanced tones.
Video cameras are set up for filming perfect skin tones: white balances are quick and easy to do, the black and white view finder helps assess exposure and zebras can be used to check skin tones or blown highlights. On a video camera you would never just look through the view finder and think "yeah looks about right", without actually checking these functions, so why do it with a DSLR? The following is a method I have found useful for getting accurate skin tones.
Firstly, we'll look at white balance.
How to get the correct white balance on a DSLR.
In some situations it is fine to use the white balance presets. If it is a bright sunny day (around 5600 kelvin) then the outdoor preset will be about right; and the same is true if you are indoors using tungsten light, the indoor or tungsten preset will work (at 3200 kelvin). However, often when filming interviews the light tends to vary from these presets. You could be shooting indoors with a tungsten lighting setup, but ambient daylight could be creeping into the room, changing your 3200 kelvin light into something altogether cooler. One option is to look at the light, make a guess and say it is around 4500 kelvin and turn the WB wheel around to 4500 kelvin and make minor adjustments from that figure. There is an issue in this though, how do you know your monitor or evf is showing the correct colour? The monitor colour can often be slightly different from that displayed on the back of the camera, and in any case you are just guessing. A solution to this can be to us an 18 percent grey card.
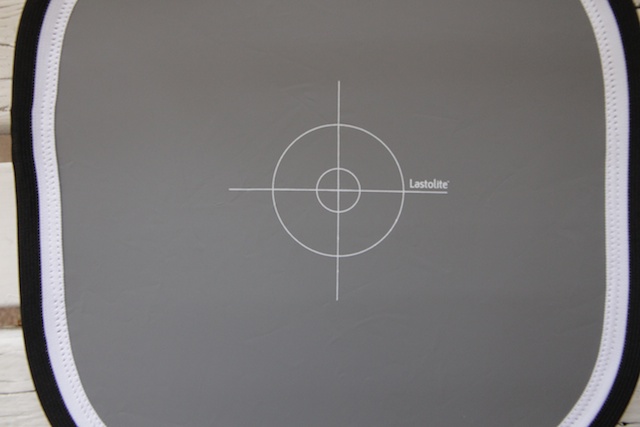
How to use an 18 percent grey card
When shooting with traditional video cameras I have always used a white card, however, it seems many photographers tend to use a grey card, the reason for this is that although both colours should give a correct white balance reading, a white card can occasionally reflect light directly into the camera lens, and give a false white balance. Since HDSLRs are essentially stills cameras, I use the grey cards that photographers prefer.
The grey card should be held in place of the person you are shooting. Make sure it is at head height as the light quality could be different elsewhere in the shot.
This is the menu screen for the Canon 7d (I imagine most cameras will be pretty similar and use the same icons).
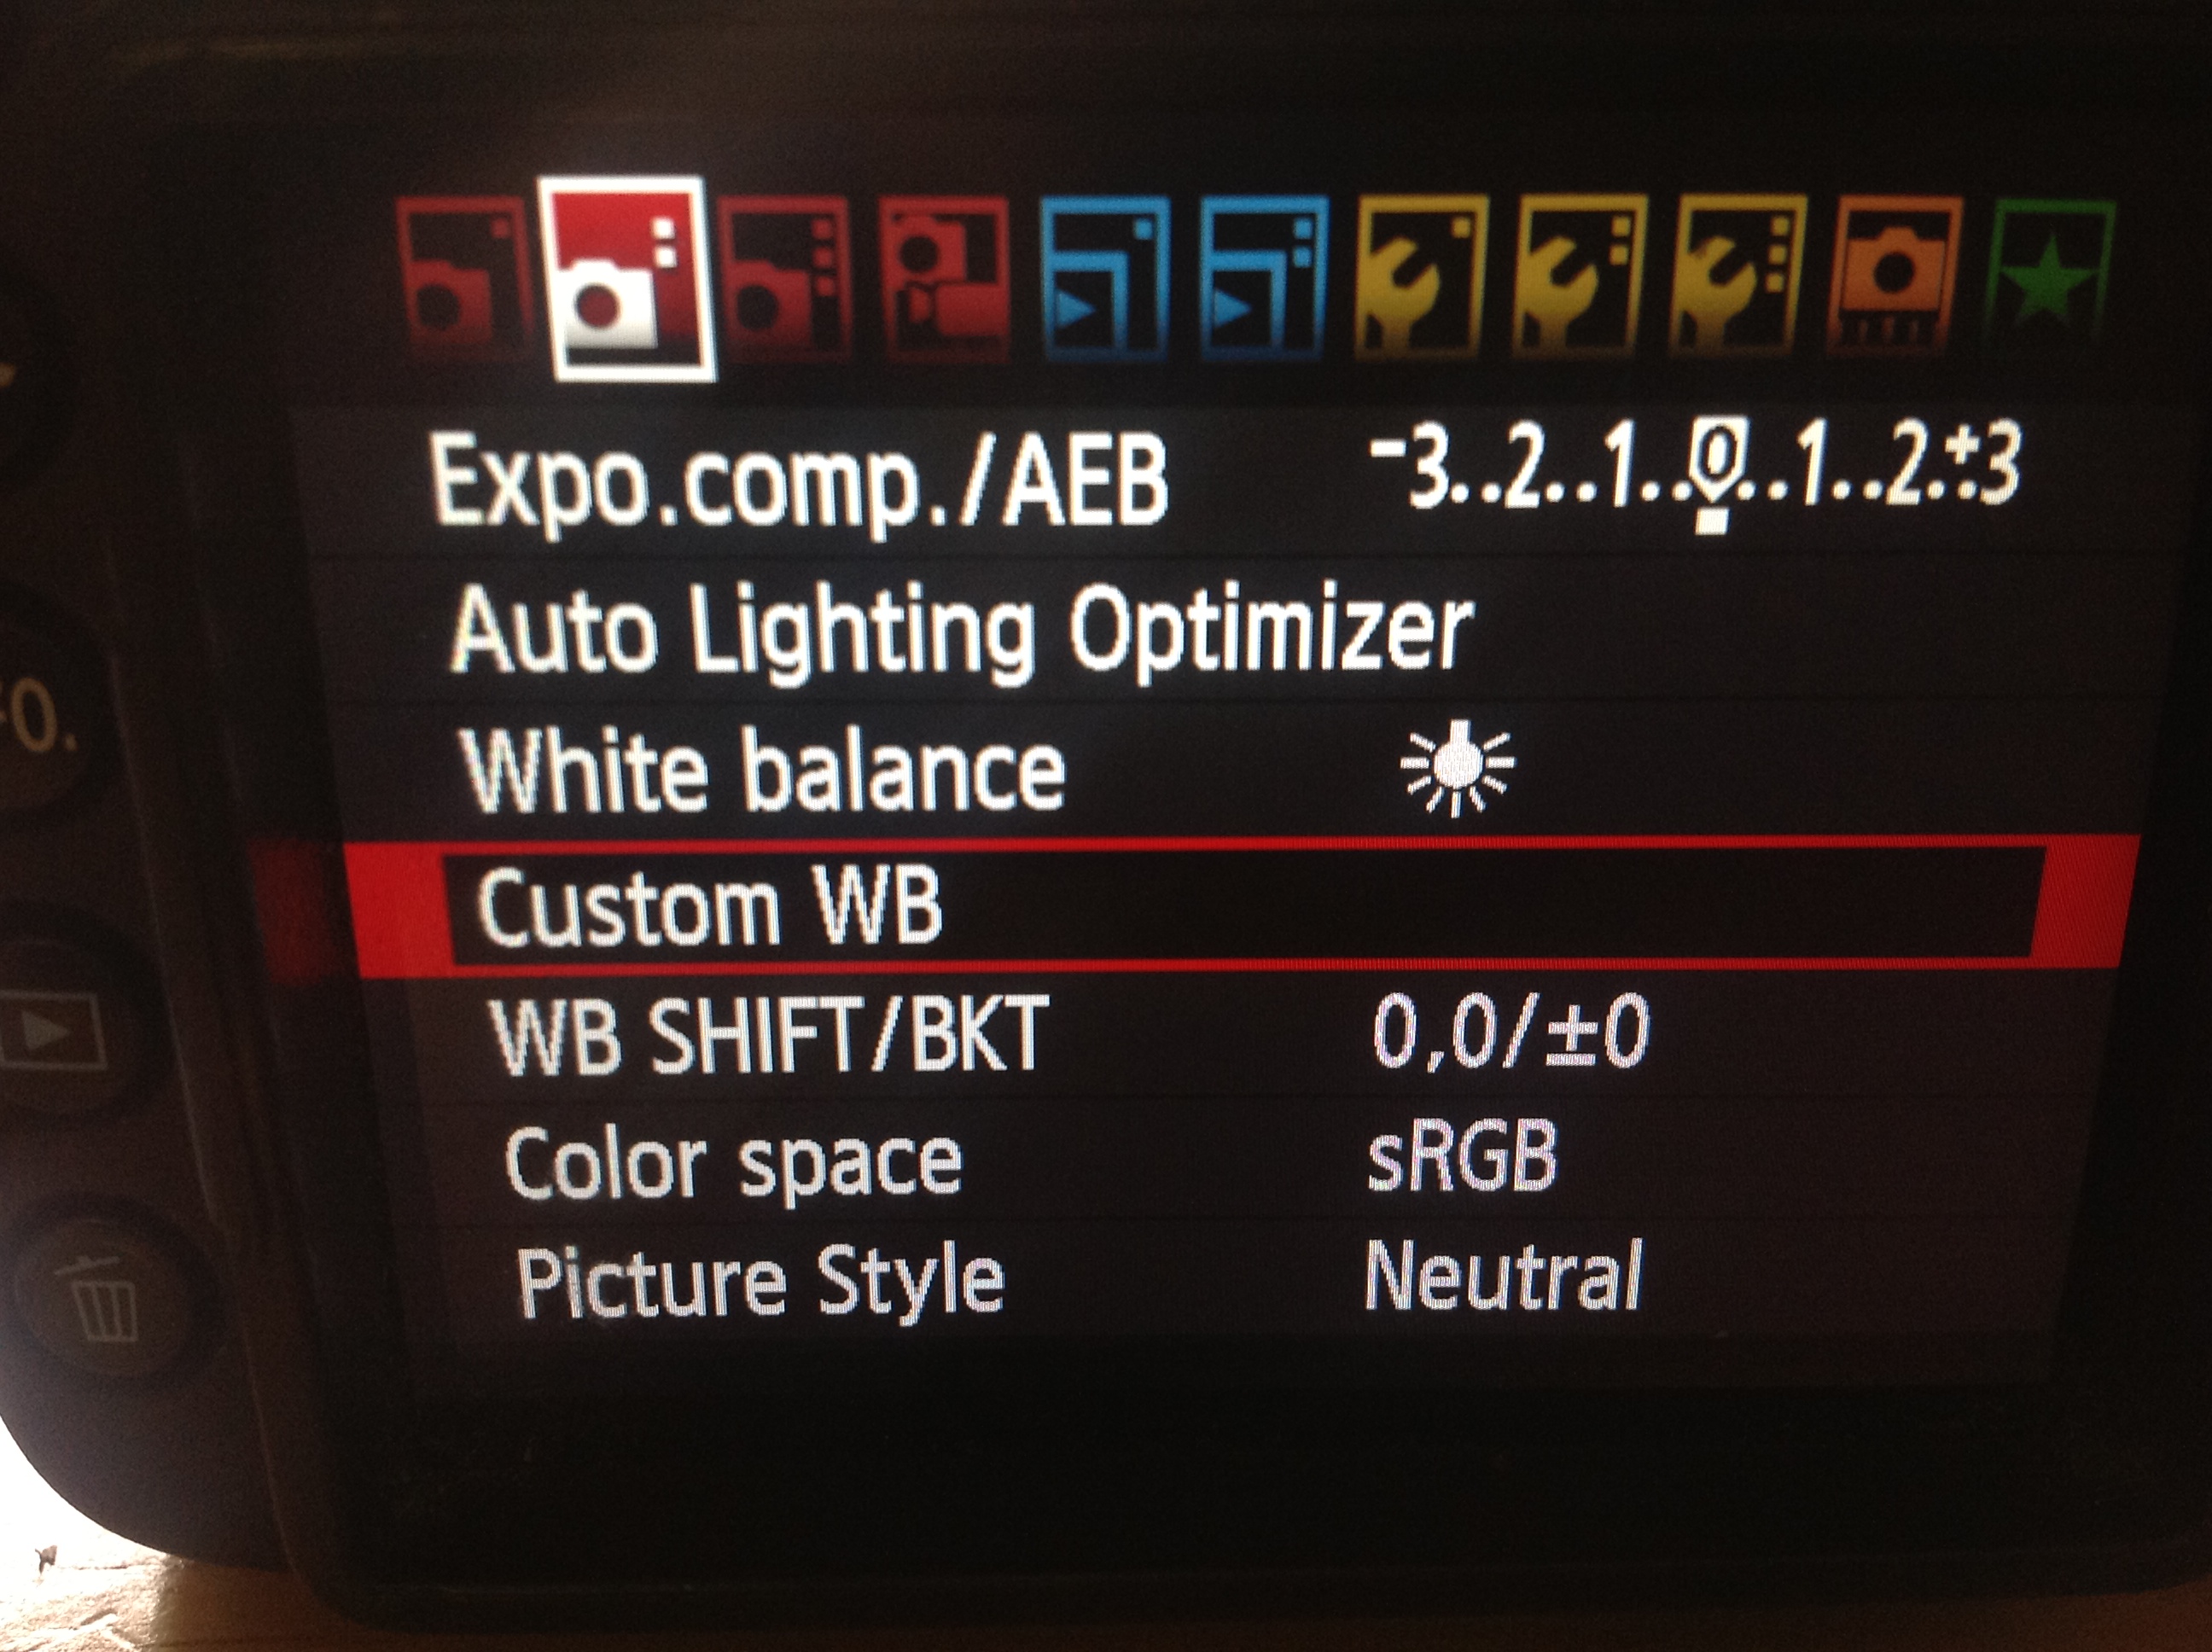
Stage 1:
Take a photo of the card, with the card filling the frame (if you are unable to fill the frame with the card, make sure the metering mode is on spot, so you are only metering off the card, and not the entire scene. You can now use this photo to as a reference to set white balance. Hit the MENU button, go to the 2nd page of menu items and hit Custom WB.
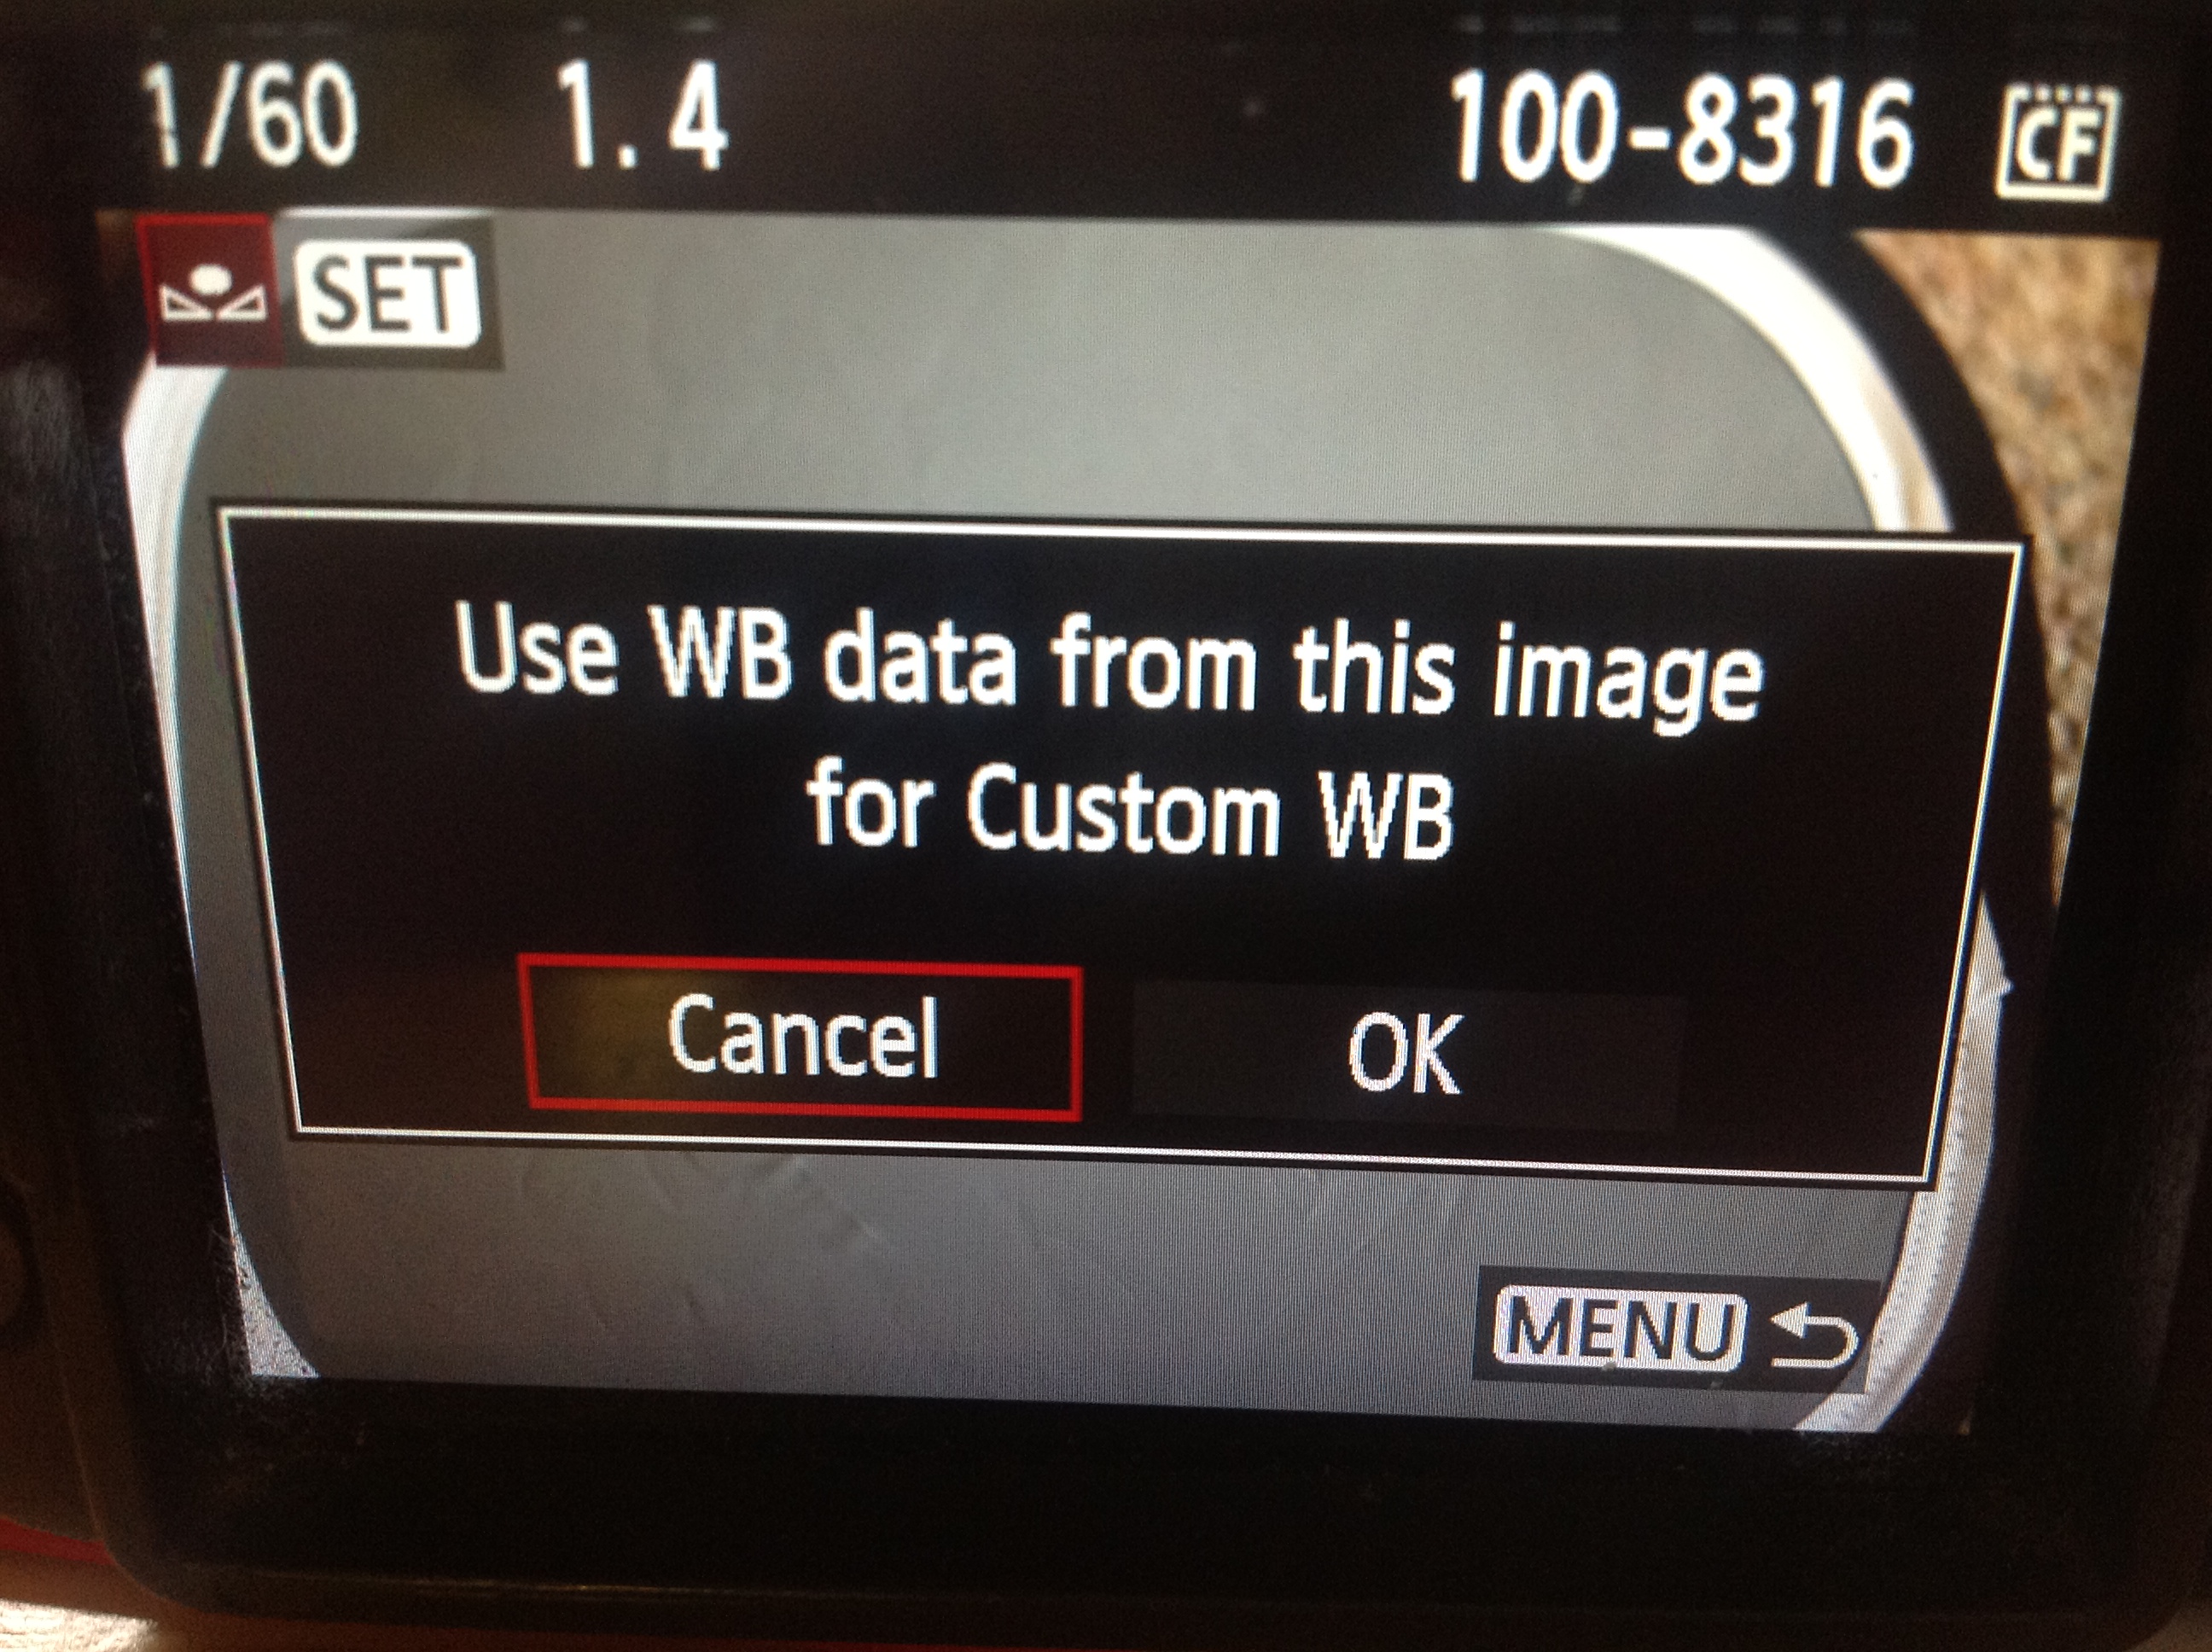
Stage2:
A screen will pop up on the photo of the grey card you have just taken and ask you if you want to use that for your custom white balance. Hit ok.
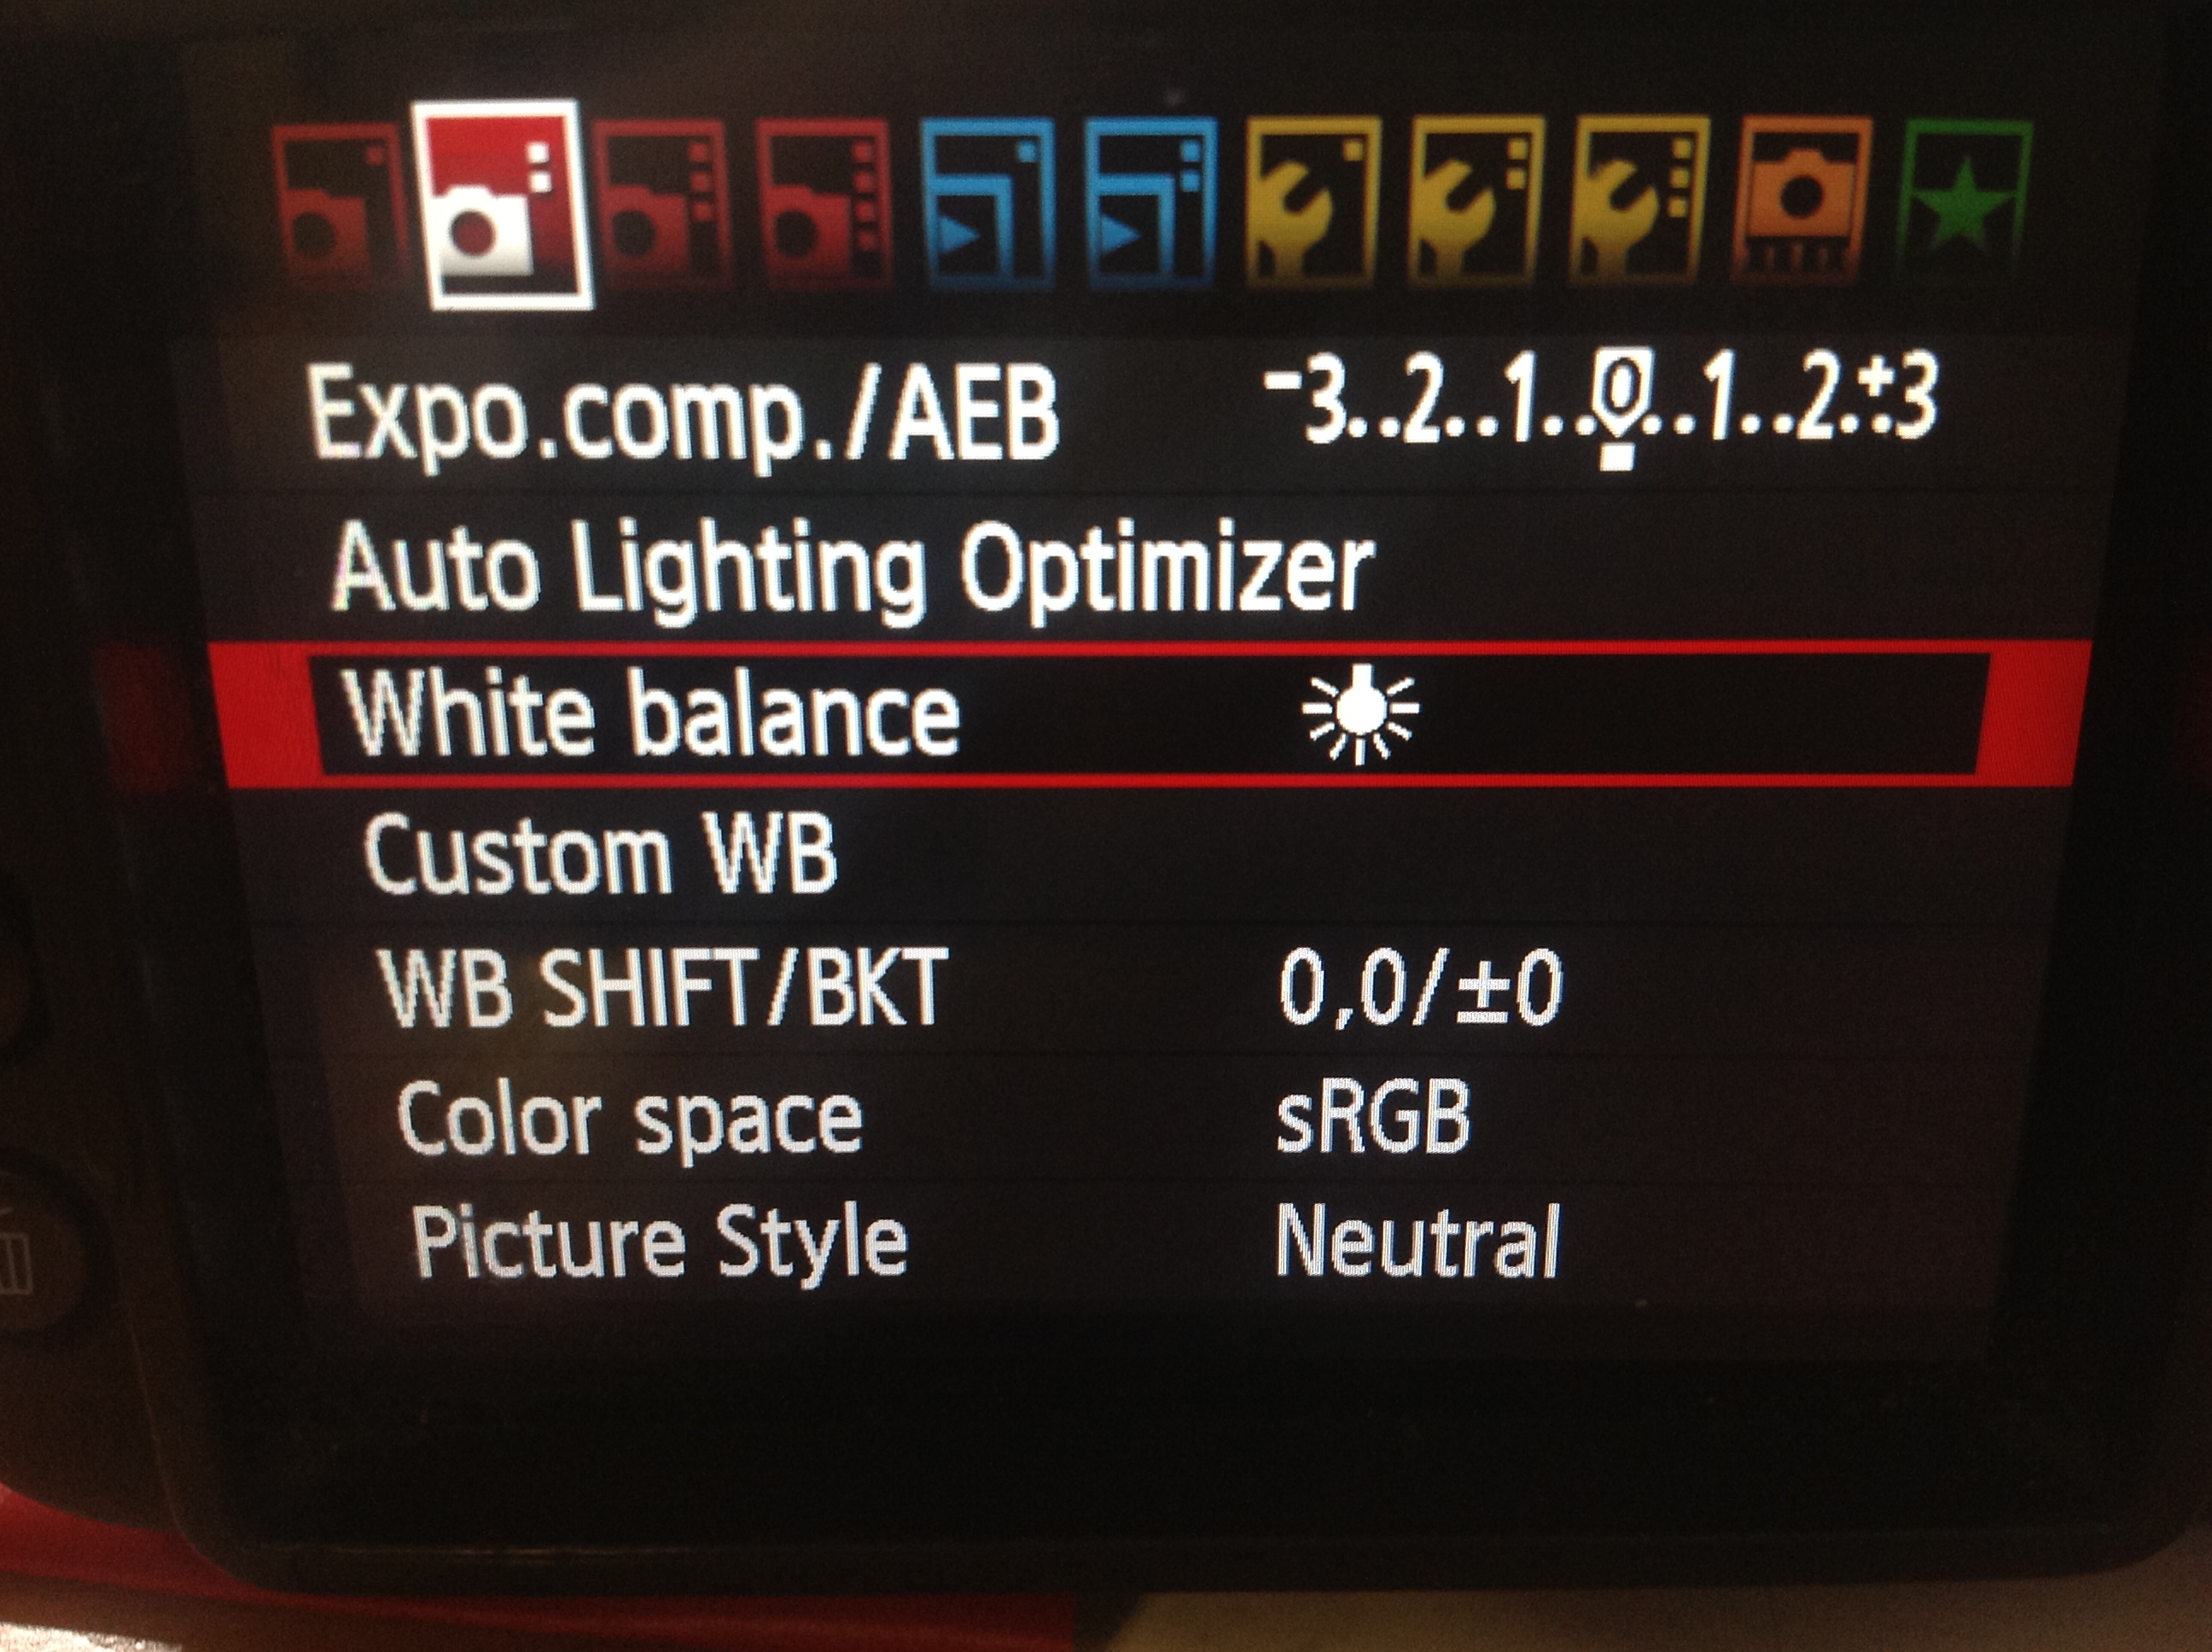
Stage3:
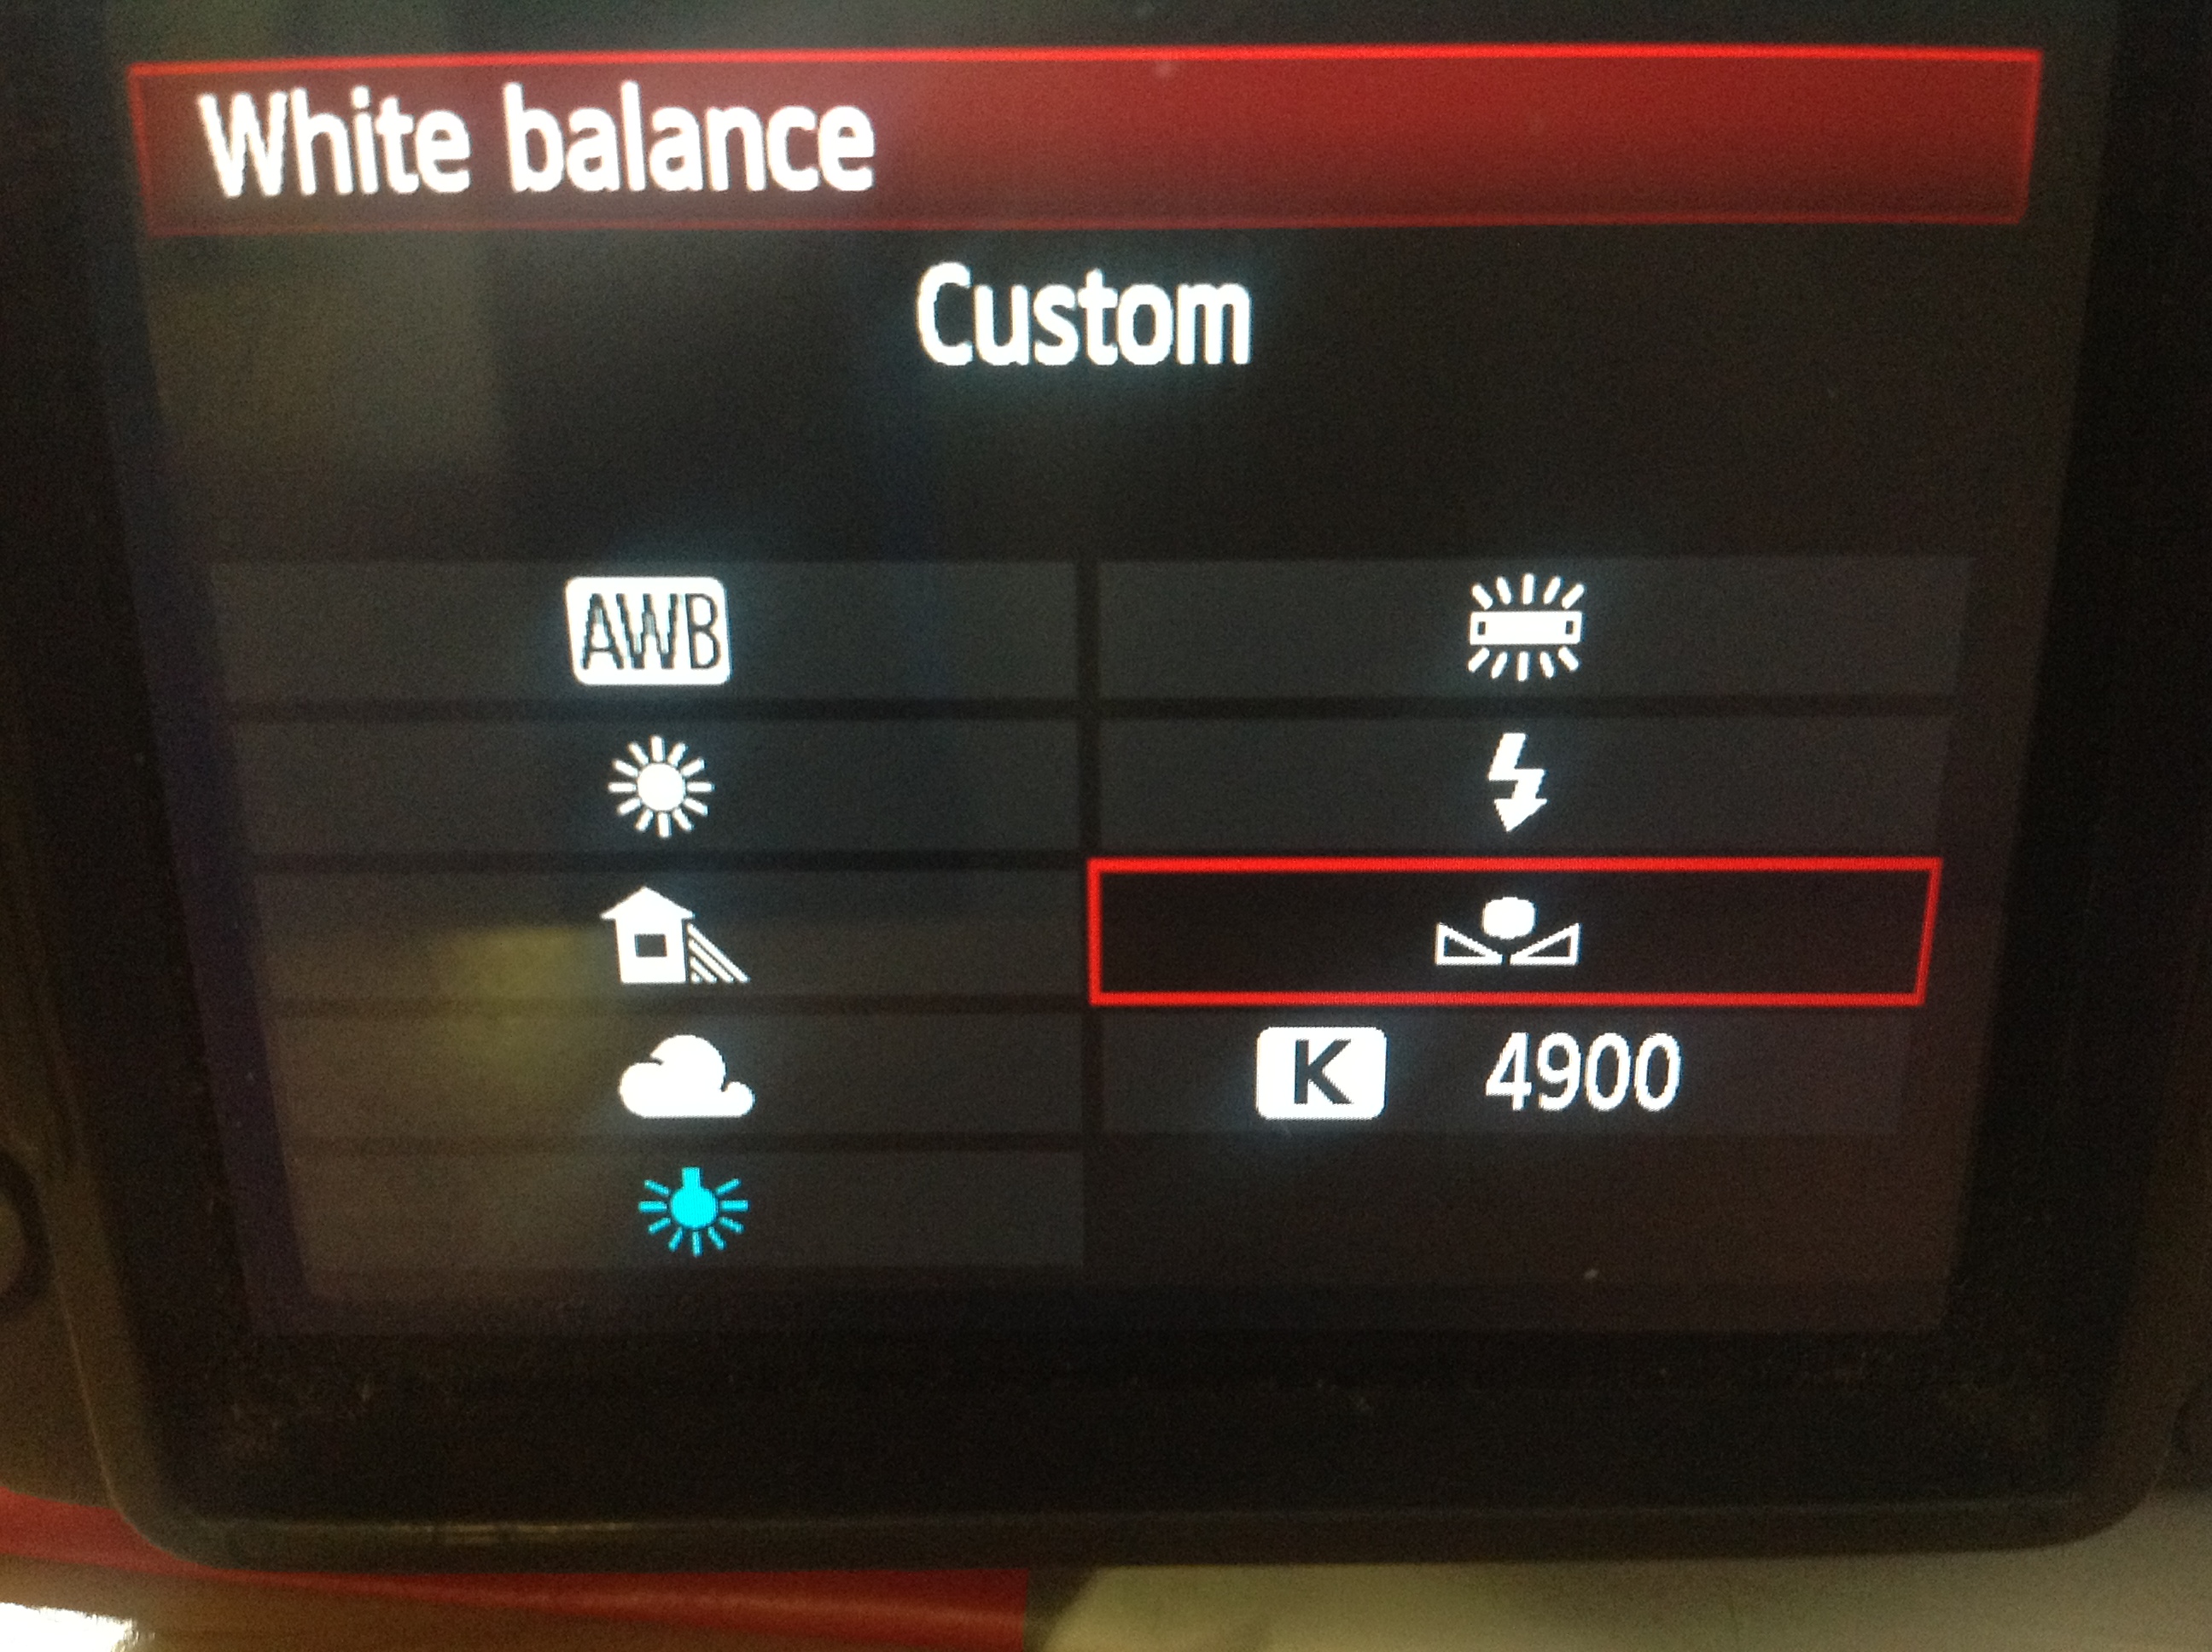
After this you need to make sure you are using the custom WB reference you have just taken. Again, press MENU, go to the 2nd page, scroll down to White balance, hit this and you will go through to a page with 9 options, pick the custom white balance option. (The WB menu also has its own button on the top of the camera, I also have white balance set up in my custom menu so I can access it quickly as I use it a lot.)
The next thing to consider is exposure. Monitors are a great way to check correct focus on DSLRs, but they are not always perfect for exposure. This is where the 2nd use for your 18 percent grey card comes in handy.
Using and 18 percent grey card for perfect exposure for skin tones.
 This is a picture of my 18 percent grey card. In this picture the exposure line was dead set in the middle (ie at 0, rather than a plus or minus figure). The histogram should show a single fat line right in the middle of the graph.
This is a poorly exposed shot of the same grey card. This was taken with the exposure line still in the dead centre, meaning that the shot as a whole is correctly exposed, however, the card is very underexposed. If this was someone's face masses of detail would be missing from the image.
 For this shot I kept the exposure at the same setting as in picture one, I then re positioned the camera and took the shot. The exposure reading was saying 2 stops over, which it is when you consider the whole frame, the highlights have blow out but the grey is correct. If you look at the grey card in this image, the exposure of the card is right and pretty much the same as in the first shot. So if you were filming an interview at this exposure the skin tones would be accurate.
You can just use a normal grey card, but I prefer to use this little popup ones from lastolite as they pack down really small and are very tough.


The last thing to consider with this is not everyone's skin tone is exactly the same as an 18 percent grey card. A white skinned person, without a tan will be over the middle line by a stop and a back person will be under it by a stop. It is still well worth taking a reading from an 18 percent gray card though, so you know where that middle is.