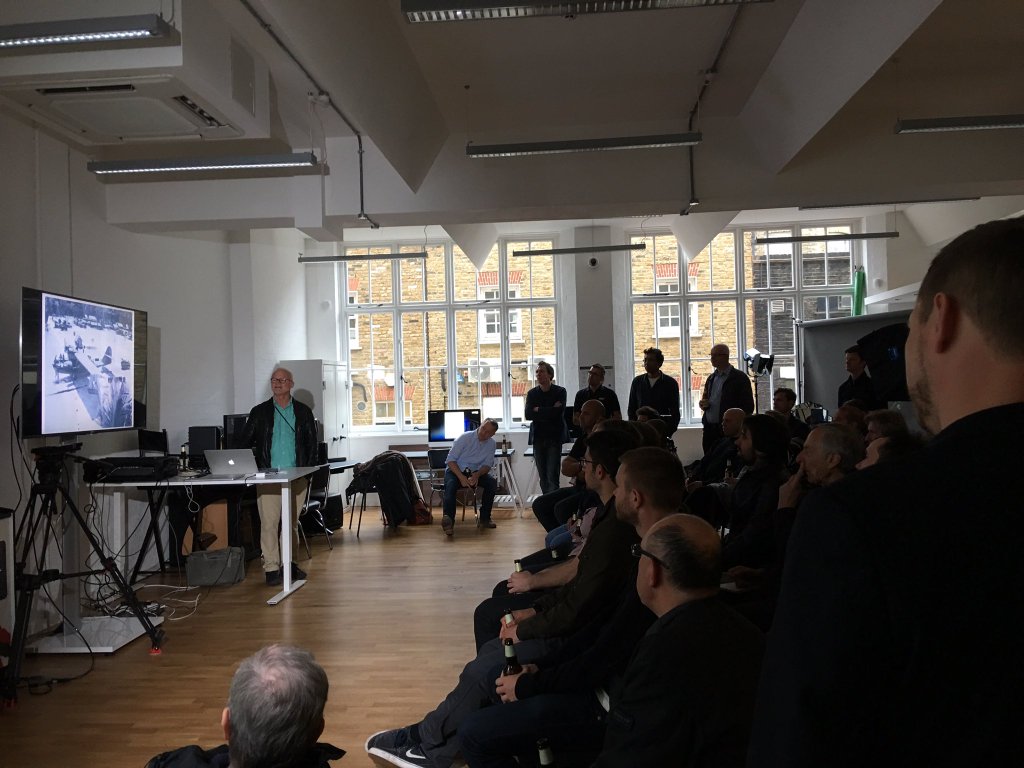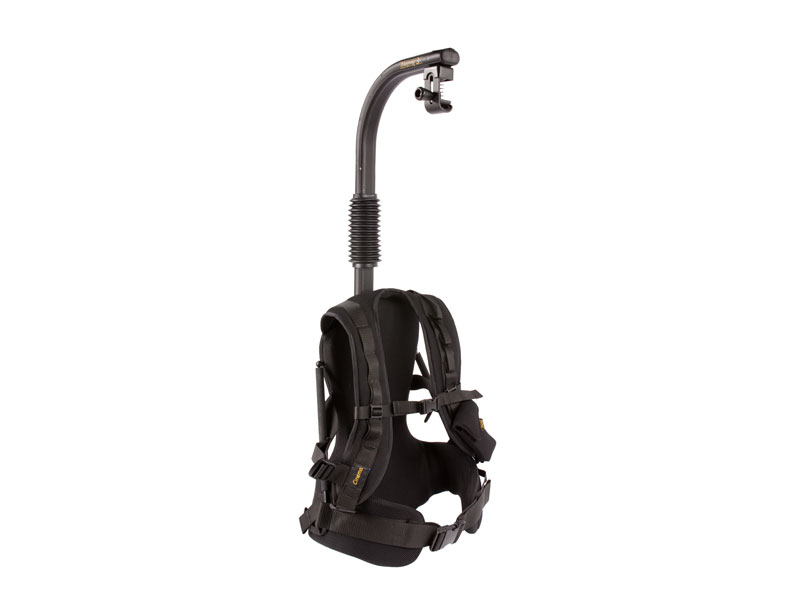
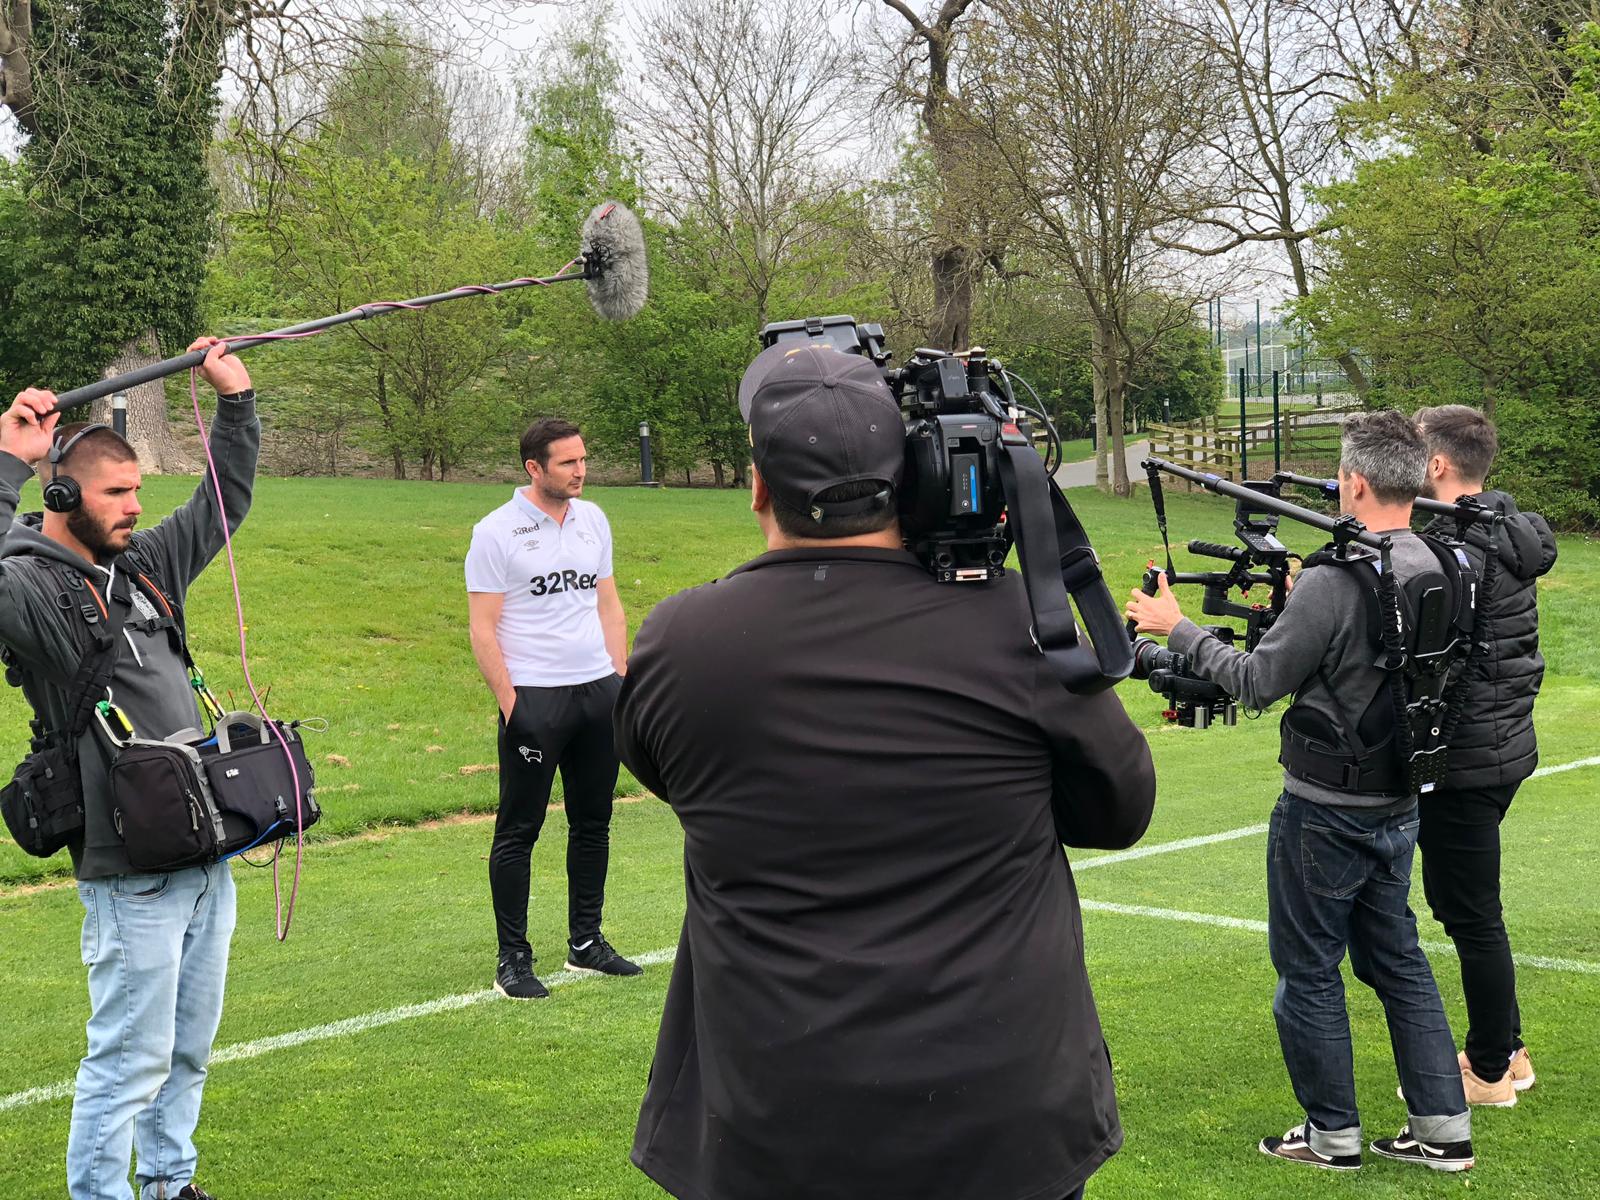
Easyrig camera supports have been growing in popularity recently. I've used them on and off for a few years, so I thought I'd answer the question:
"Are they worth it?"
The first, and most obvious, benefit of using an Easyrig is that they spread the camera weight evenly around the hips, rather than all of the weight sitting on one shoulder. Typically if you are shooting on the shoulder the camera weight is all on the right side of the body. The back muscles on the left side of the spine have to work hard to correct this imbalance, and that leads to tension or back ache, usually in the middle of the back on the left side. The Easy rig gets rid of this issue.
I don't tend to do lots of handheld work, so haven't had back issues. My question then becomes:
"Will using an Easyrig improve my handheld work?"
This is a slightly tougher question to answer. There are certain big pluses of using the rig, one being that you can get the camera to any height you choose and hold it there easily. Without the Easyrig, you really have two options: shooting from the hip, or on the shoulder. The Easyrig allows you to shoot anywhere in between. The tension from the wire makes the camera a dead weight, so it's really easy to just pull the camera down to whatever level you want, and it will just sit there.
The other advantage is that it is so much easier to hold the weight of a camera that it allows you to use a larger zoom lens. If you are on a shoot where you want to shoot without having to go back and change lenses all the time, having one big zoom attached to the camera can be useful.
Another question that I had before using the rig was:
"Will an Easyrig make my shots look smoother"
The Easyrig itself, isn't stabilizing the shot for you, the weight is just transferred from your shoulders, to your hips. My feeling is that the rig doesn't actually make your handheld work look smoother. However, I do think that the static shots are improved. I.E If you are doing a move from one thing to the next hand held, having an Easyrig won't make the shot look better. However, if you are doing a static shot, the Easyrig does help in my opinion as all you need to do is keep your legs and hips static and the rig will do the rest.
So the final question is:
"Should I buy and Easyrig"
As always, this depends on the operator. Personally, I don't really do enough handheld work to justify it. If you do a lot of handheld work, I'd say it's worth it. Years of work are eventually going to take its toll, and if you ever need a few days off from having a bad back, then the Easyrig would have paid for itself.
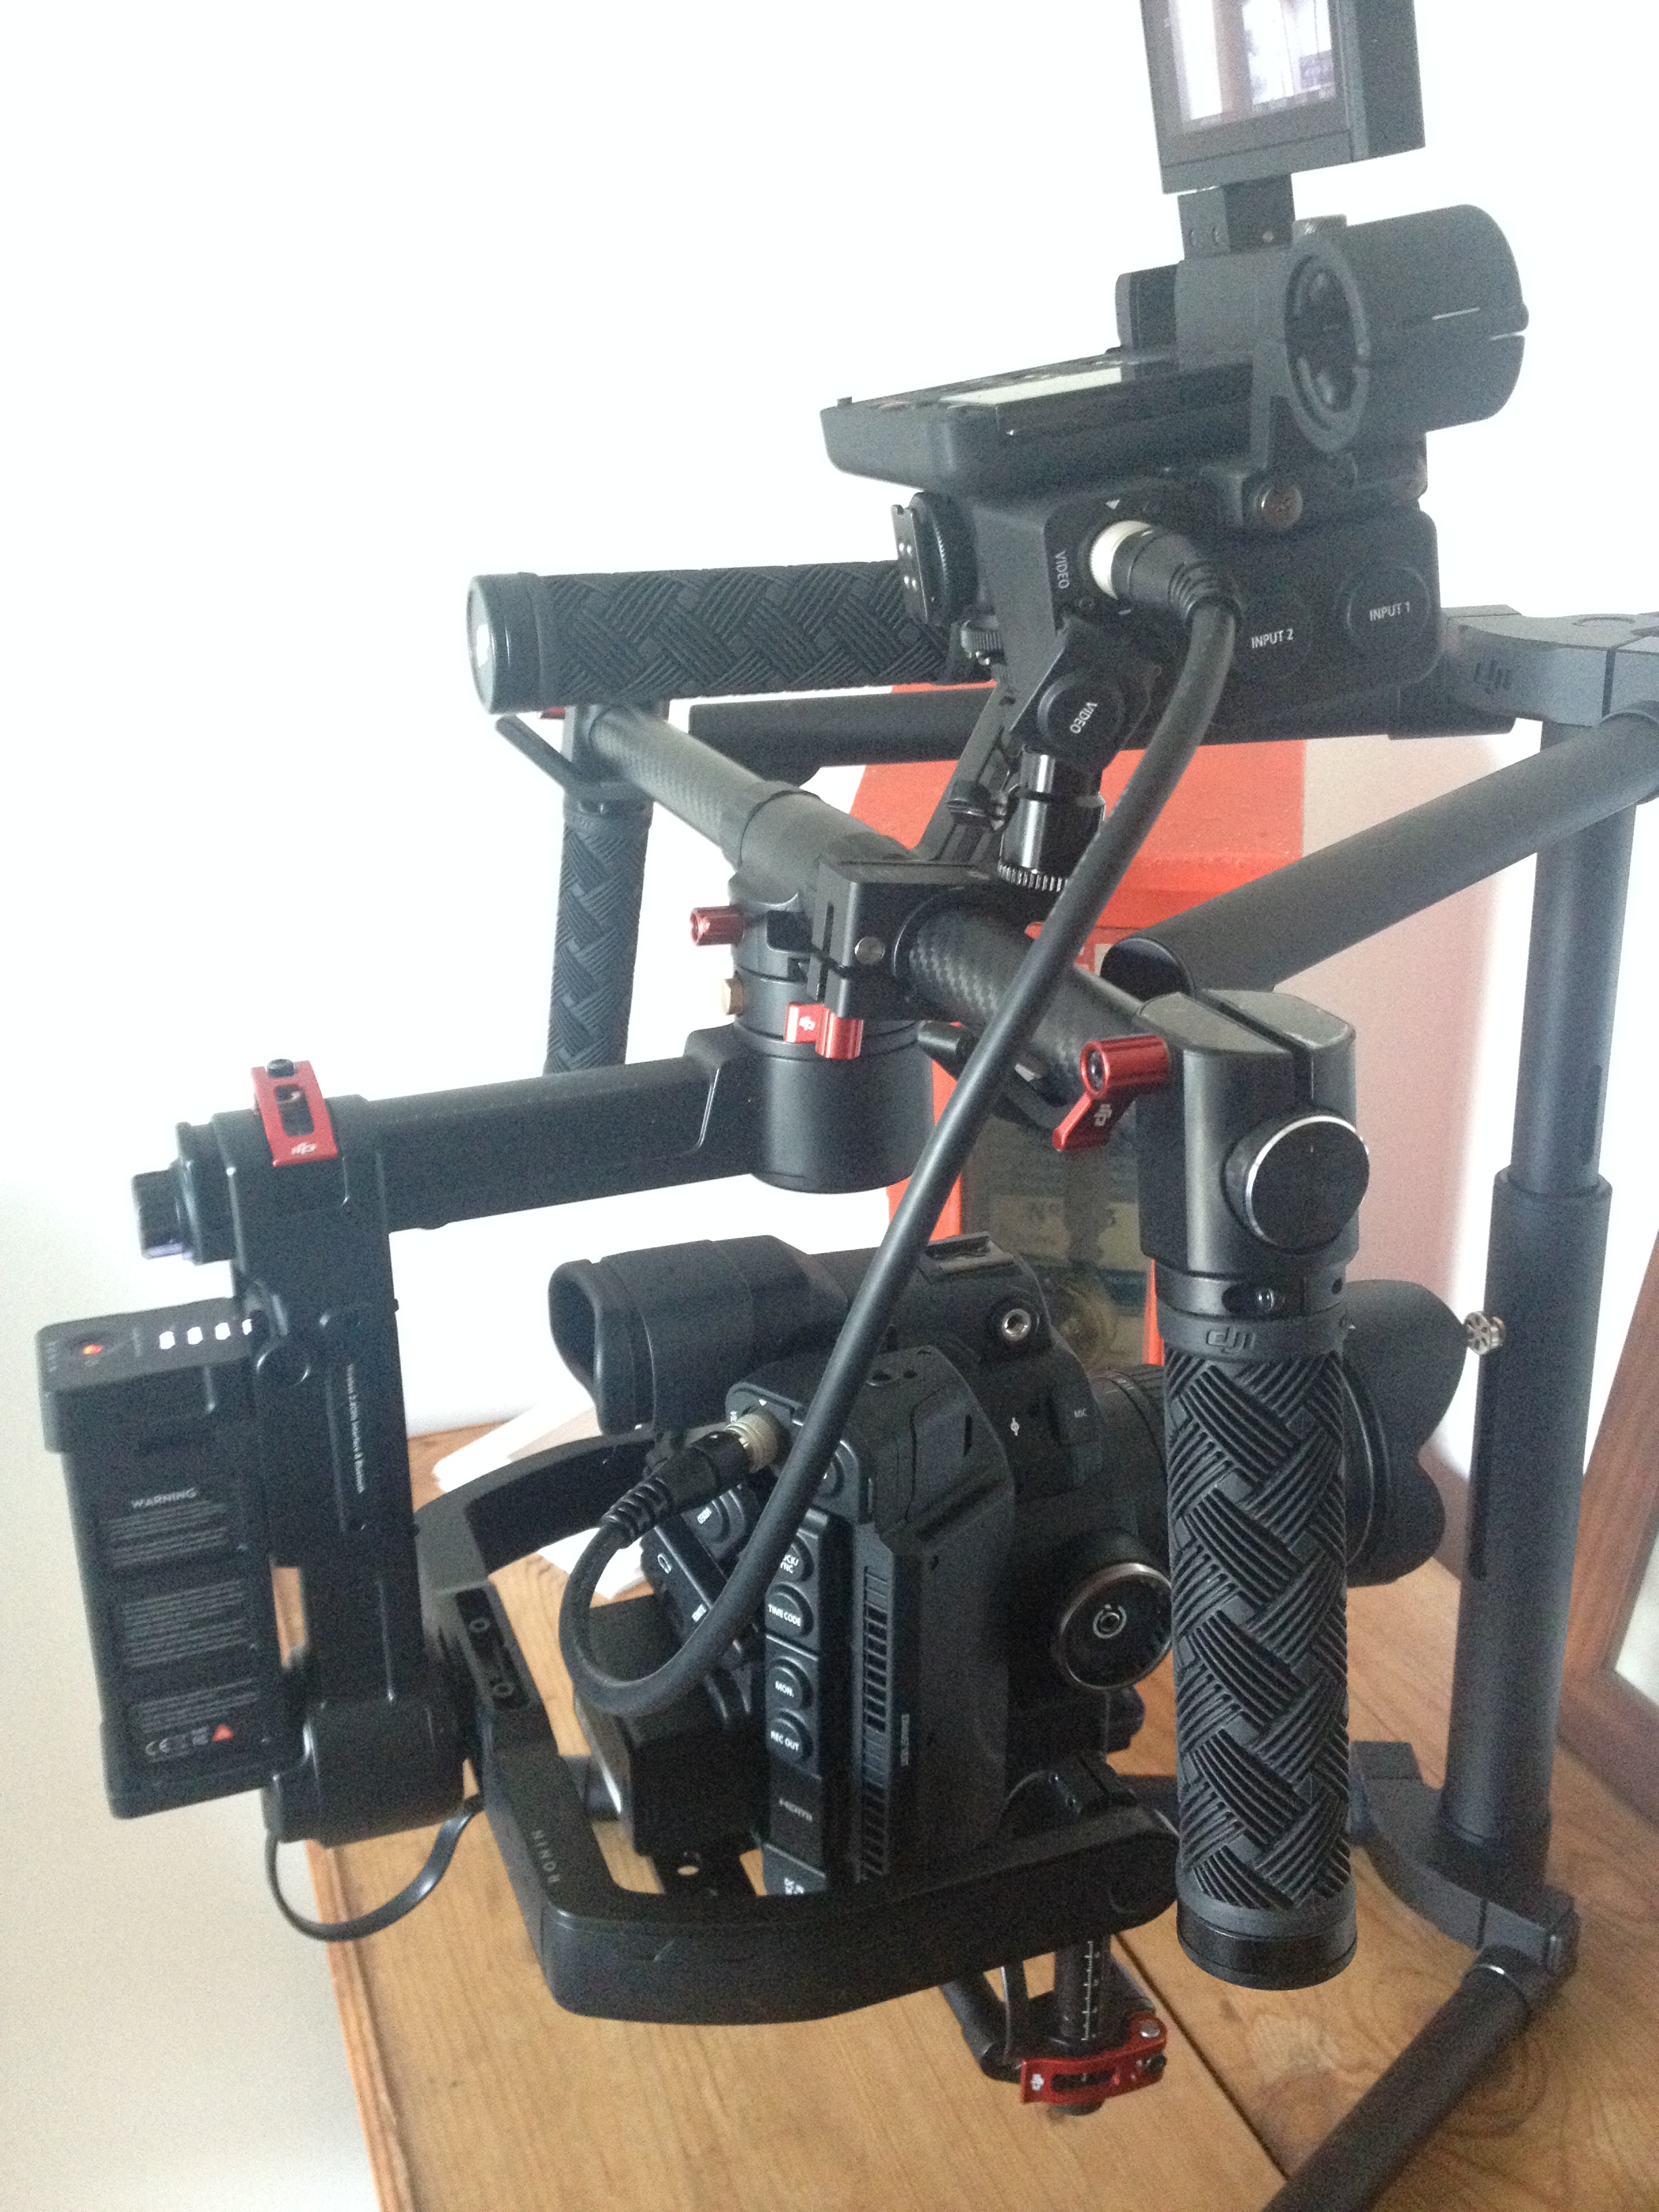
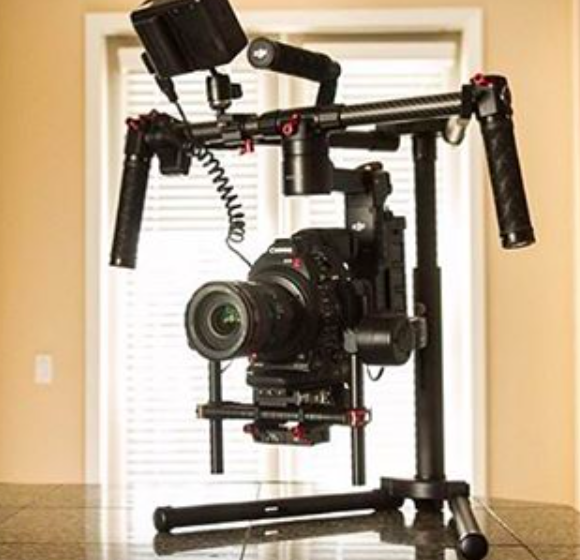
If you are thinking of using an Easyrig for use with a gimbal like the Ronin or Movi, then read this article.
Anyone who has handheld a gimbal for any length of time will know that it's hard on the body.
I have a pretty lightweight setup with a Ronin M and a stripped down C300mkii, but even this gets too hard to hold after a while. This is when a vest becomes incredibly useful. There are two options on offer here, the Readyrig and the Easyrig, so let's look at the merits of both so we can work out which is best for you.
Firstly we have the Easyrig. Easyrig have been around for years, and was originially designed to hold a traditional camera. The weight sits on the hips rather than on one shoulder and so is primarily there to save a camera operators back from years of imbalance. When stabilised gimbals came on to the market a few years ago, Easyrig added an extension arm necessary to hold the gimbal out in front of the body. You can use a gimbal like this and it will save the bicep burn, however it doesn't add any stabilisation to the up and down axis, meaning your footstep will still be transferred to the camera.

A way of stabilizing this up and down shake is by adding a serene arm to the Easy rig.
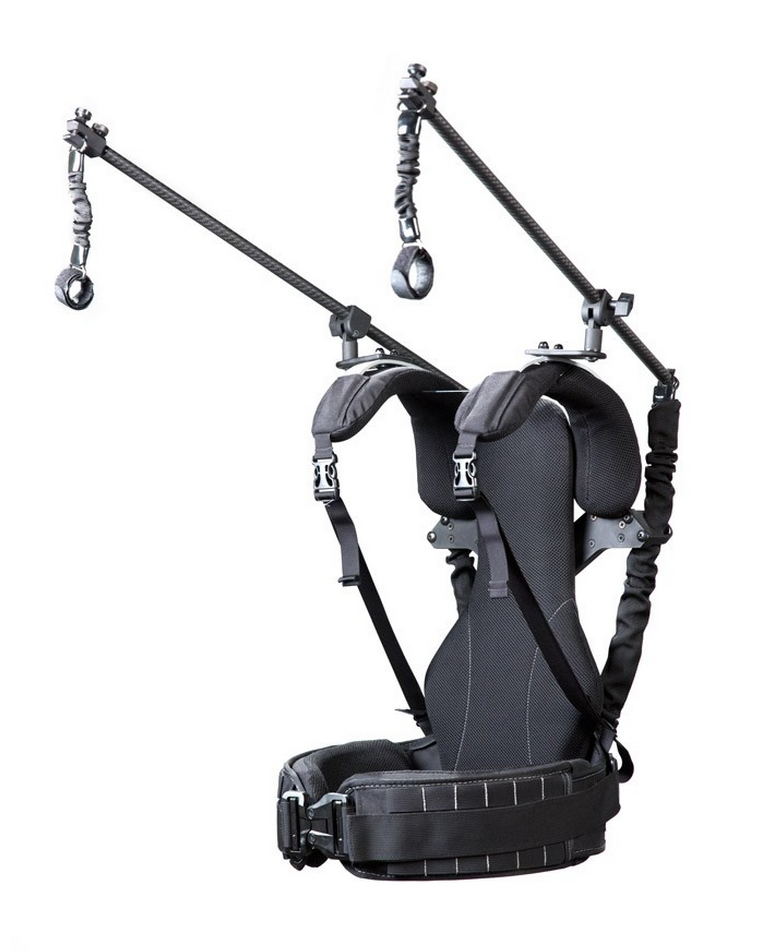
The next option is to use a Readyrig. The Readyrig is designed from scratch with the gimbal in mind. When the rig is set up correctly it will take 95 percent of the weight of the rig. The great thing about this is it will easily allow you to boom up and down. You can let the rig drop all the way down to the floor and then lift it up above your head. This gives you a much bigger range of motion than you can get with the Easyrig, it also takes out more of the up and down motion than the serene arm can. This means you can run along with the rig and be a lot less concerned with your footsteps being transferred to the image you are filming.
So which rig is right for you? If you already own the Easyrig and want to add the Serene arm to give you some extra stability when using a Ronin, it's probably a good idea and will save you buying a whole new vest. Also if you want a product you can use everyday as a camera stabiliser and occassionally use it to help you out with a gimbal then again the Easyrig might be right for you.
However, if you want a vest dedicated soley to the gimbal then the Readyrig is definitely the way to go in my opinion. I have shot with it for well over 2 hours solidly without taking it off and found it managable and thought the shots were fantastic, particulaly as it can add so much control to that 4th up and down axis.
Here is a question I received last week.
"I can follow action really well. But when it comes to framing objects for b roll, and framing interviews, I need a lot of training to get the shots I love to use in an edit. I am determined to get better though.
In the edit suite, I can easily pick the best framed shot. But when I look through the viewfinder, I don't really know where to go. What do I look for, what's my "go to" basics when framing shots."
This is slightly tricky to answer. I've been shooting for a long time, so when I compose a shot, it is not an intellectual exercise. I don't think about the rule of thirds or where to position the subject, I just set the camera up instinctively and film the scene in the best way I can.
However, this doesn't help anybody, or answer the question very well. It is also a question I remember asking when I first started working in television, so I'll do my best to come up with a few tips for shooting B-Roll or GVs.
- Firstly, remember you are putting the 3D world in to 2D. It is therefore going to look very flat, unless you can add some depth. You can add depth by shooting objects in the foreground very close to the camera with the background far away. This will give the impression of depth.
- When following action, the tendancy is to put the subject in the middle of the screen. Generally it's worth avoiding this with B roll. Try putting the subject off centre to one side.
- Try to to show what you are filming in a new light. If you are shooting a famous monument, viewers have probably seen it hundreds of time before. Try to capture it at a different angle, in different light, with something else in the frame. All of these things will stop the shot looking like the standard postcard image.
- Keep in mind the reason for shooting the image. What does the editor or director want to say with this shot? Maybe they want to show the time of year, perhaps having snow in the foreground, or a tree with no leaves will help tell their story.
- Look for lines that dissect the screen: a railway line, a path, a row of houses, an electricity cable all of these things can take the eye somewhere and get us away from a flat image.
- Try to avoid shooting in the middle of the day, when the sun is overhead and there are no shadows. Things tend to look much more interesting first thing in the morning, when the sun is low in the sky, or in the late afternoon. If you really want to take control of your B-roll try using an app to track the sun. Its really easy to do. You might see a great shot and thing, that would look great with the sun in a certain position, just work out what time that will happen and come back for it.
- Play around with lense choices. Just becuase you are shooting b-roll doesn't mean everything has to be on a standard wide angel. You can get different shots with different lenses, make a busy street look even busier, compressing it with a long lens or get up super close and shoot ultrawide.
- Try a out a few filters. Using a soft-edge ND grad will give a more dramatic look to the shot, darkening skies and it can also help balance out a picture so a sky is not over exposed. It's also worth looking at a polariser which can help accent a few details like water or clouds.
Imagine you have been asked to get a shot of the Eiffel tower, going right up to the park and getting a shot with the tower in the middle will give you a typical postcard image. Imagine a shot from a few streets back with litter in the foreground, or some barbed wire or graffiti, or a cafe in the evening with people drinking outside, a lone shot of someone walking their dog. Each of these images, says something different and the trick is finding something that helps the narrative of what you are filming.
Try shooting some shots, whether video or just with a stills camera with a prime lens, say a 35mm or 50mm. If you look at a scene and think it all looks interesting, the temptation is to shoot it on a wide lens and get it all in. Using a tighter fixed lens forces you to make decisions, it forces you to ask what's really interesting in the scene. Many photographers favoured just one lens - think Henri Cartier Bresson. I think the forced constrainst imposed by a prime lens can be useful.
Finally, get inspiration from great photographers and cinemaphotographers. This could be anyone you like really, but to get you started, here are a few people I like.
The shot above is from Emmanuel Lubezki (The Revenant, Birdman). A lot of his shots tend to be quite low contrast. I love his work, he always manages to get his own original look into the pictures. I find it hard to describe why i like it, so I'll just leave his instagram name and you can look him up for yourself. @chivexp
The above shot is from Reed Morano. Her shots are usually really low key, dark moody affairs. She is an incredibly talented cinematographer and well worth a follow @reedmorano.
It's also worth looking at a few photographers. Recently, I have been enjoying the work of Alan Schaller
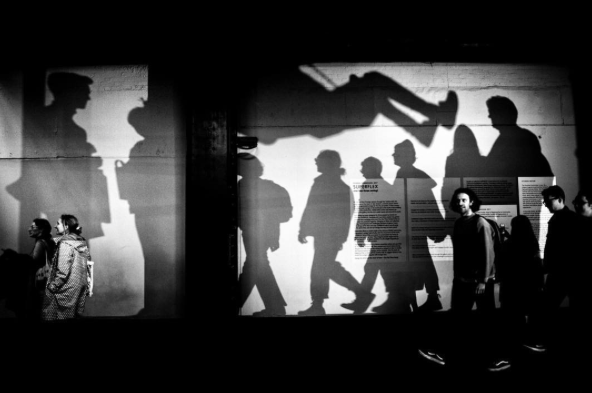
Alan Schaller typically shoots really high contrast scenes. He tends to make use of shapes and shadows in a really effective way. You can follow him at @alan_schaller
These are just some people that I like, but you may not. There are lots of people out there who are shooting great stuff, just pick a few people you like and see if you can get some inspiration from it. Click here to see more cinematographer I recommed following.
And remember that quote "Good artists copy, great artists steal"
These days, programmes are put together with footage from an ever growing number of different cameras, and then someone has to struggle to make the cameras look similar in post.
So how can we make life easier in the edit, so the poor colourist and editors aren't wasting hours colour matching cameras, when they could be spending that time making the edit look great?
There are a few different ways:
1) Choose a REC 709 profile in each cameara
2) Download AbleCine's camera match profile.
3) Shoot LOG
By far the best way of doing this is by shooting LOG profile on each camera. Sony S Log, Canon Clog or Arri LogC, REDgamma.
You would think, since all these cameras have a 709 colour profile, that you could just use that and be done with it. The problem is, each manufacturer works very hard at creating their own "look" or colour science. If you get a camera and point it at a colour chart, and then put that through a vectoscope, you will see that the colours and the overall tone varries widely. This is not just between camera manufacturers, but even between camera models.
On a multi cam shoot, I put an Arri Amira, 2 x Canon C300 mkii and a Canon C300 into a monitor and flicked through them on the 709 profile. They didn't look close enough to use without grading.
If you want to see proof of this, just check the video below. Here I show how different the Canon C300 and Canon C300mkii vary on different proflies. (I'd only recommend watching this if you are a total camera geek, skim through, you'll get the idea.)
The next option would be to download the AbleCine set of profiles for each camera you are using. AbleCine have files for most cameras on the market: Sony, F5, F55, Arri Alexa, Amira, Canon C300, Sony AS7 etc etc. Able cine have several different profiles, which vary depending on whether you are working in a studio environment, low light, or outdoors. If you are working in a relatively controlled environment (say an indoor interview) you could download the same ABNORM profile for all the different cameras.
The AbleCine profiles aren't bad, but they aren't perfect. I've used the ABNORM profile and tried to match an Arri Amira with a Canon C300 mkii. You'd get away with having these two shots in the same programme, but I wouldn't want to do it if you were filming the same interview with both cameas on the same subject.
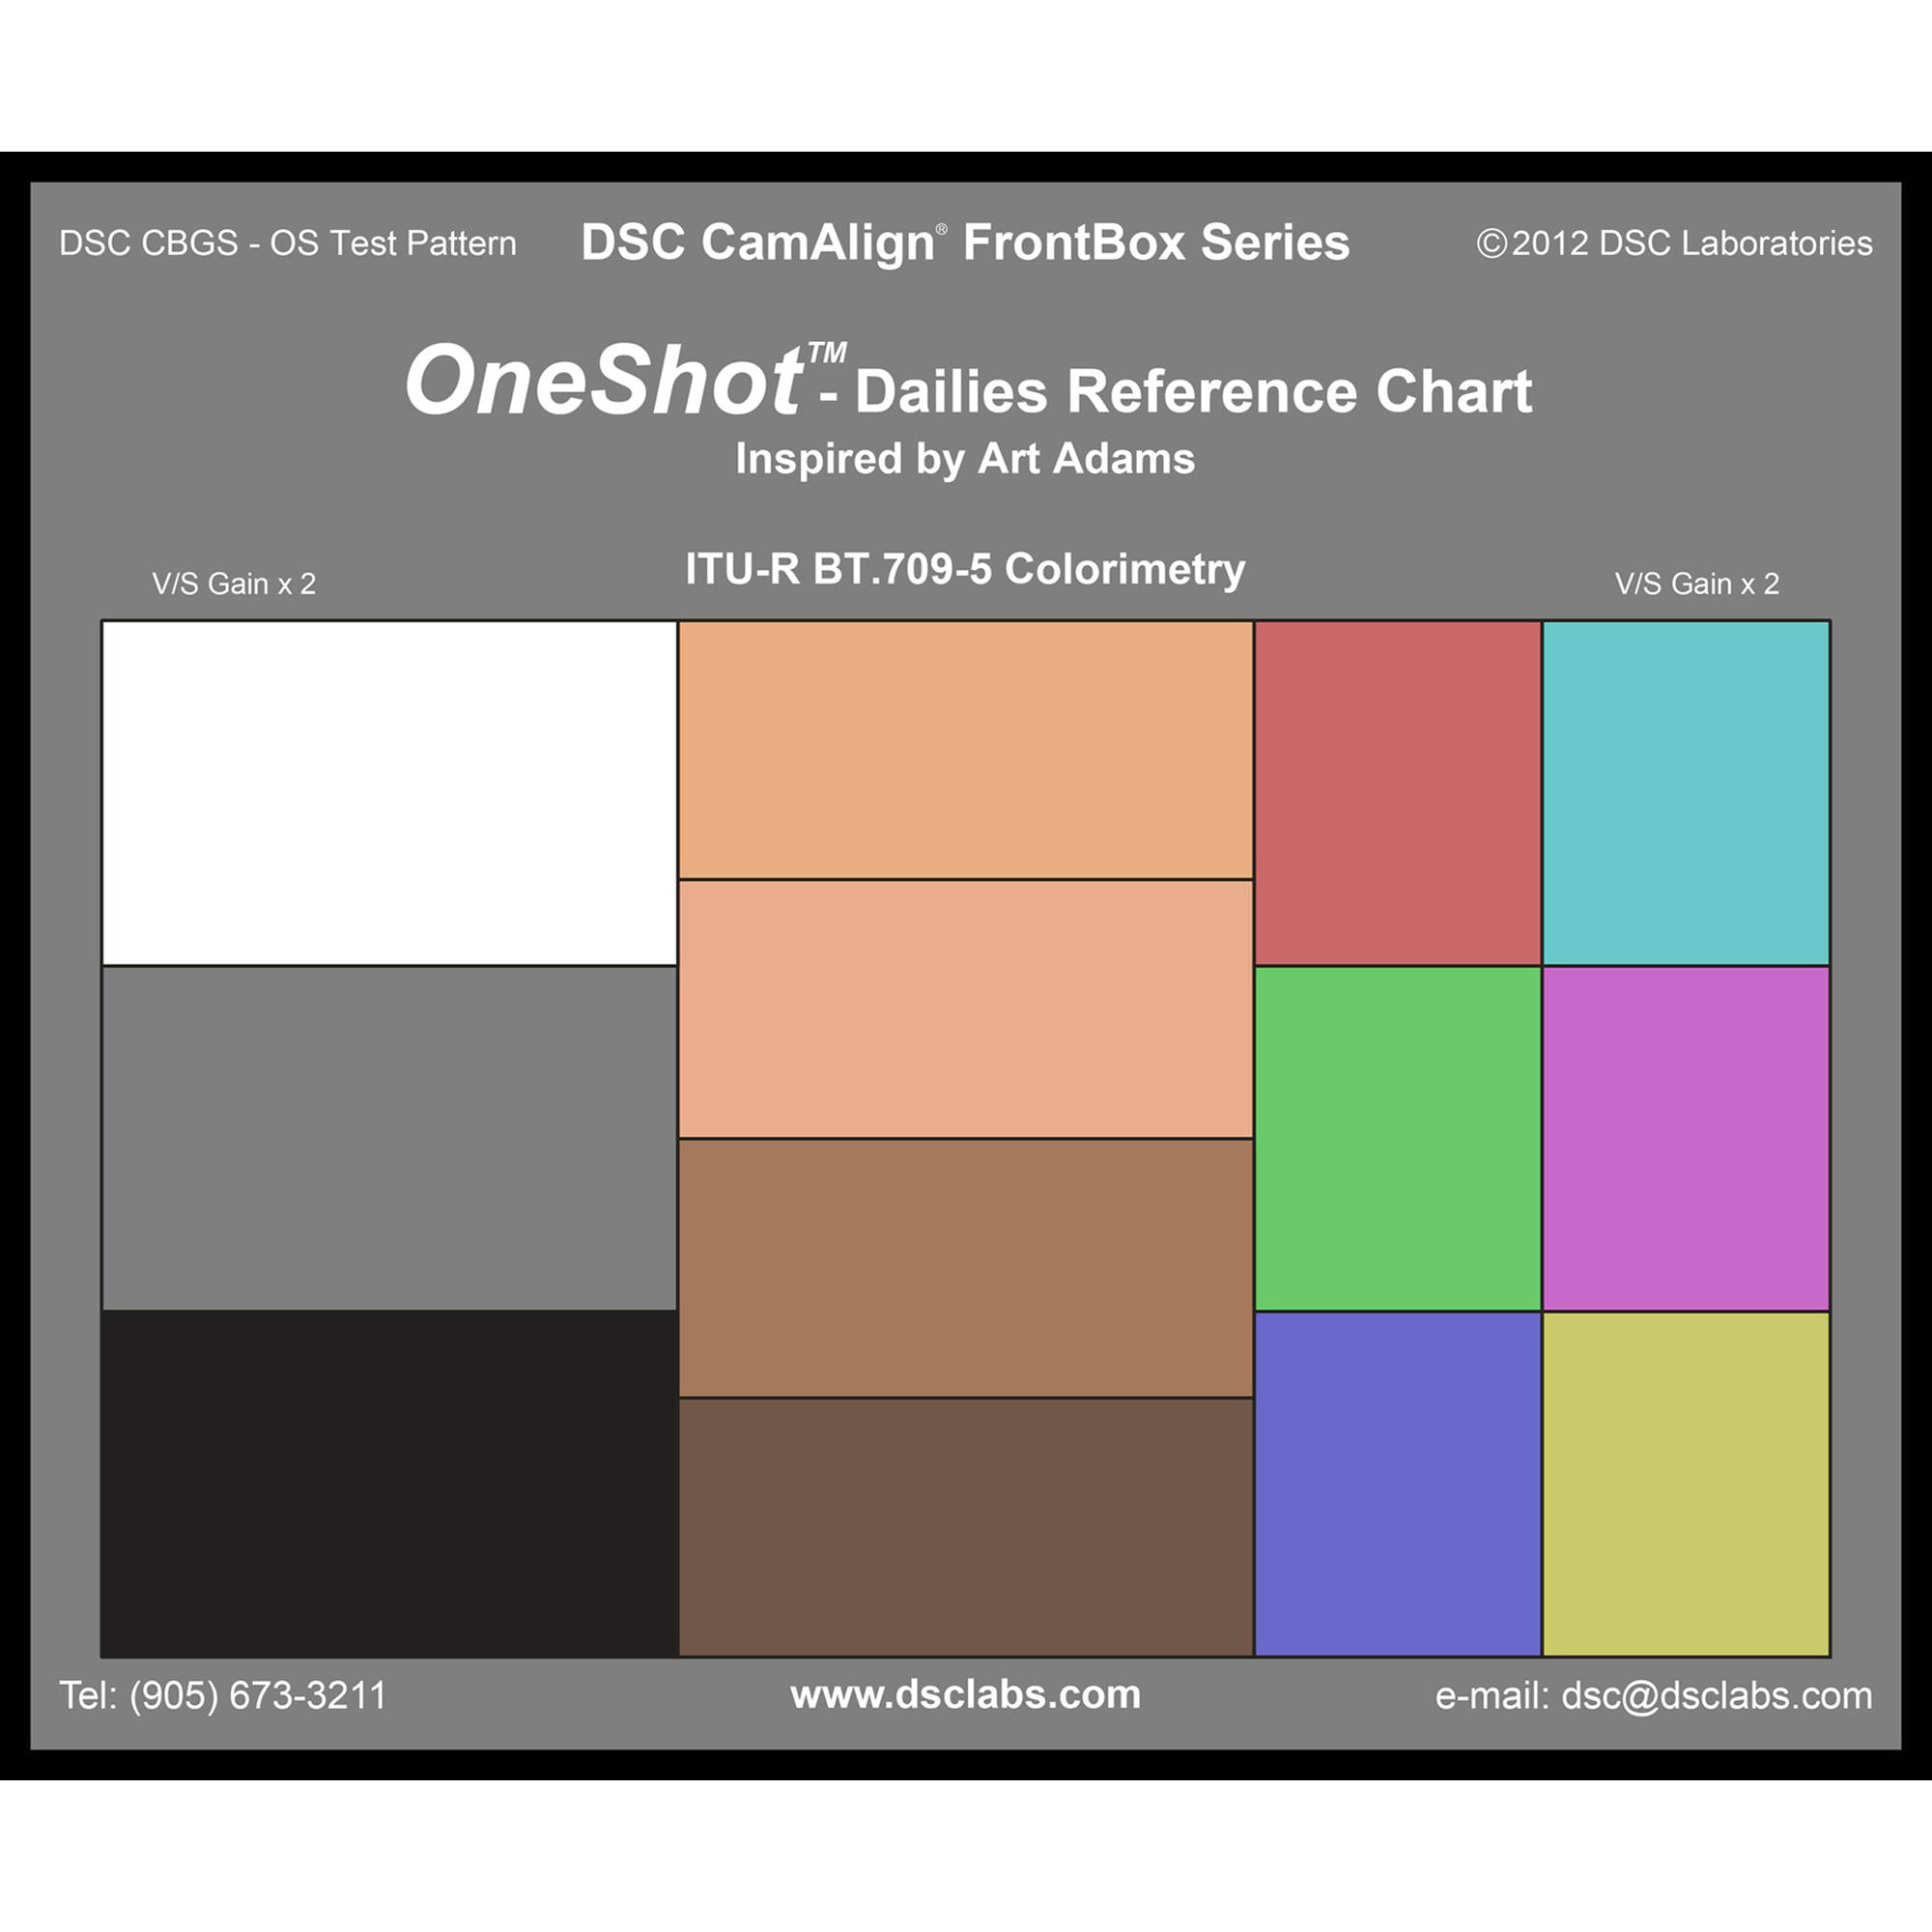
The best solution, by far, is to shoot in LOG, using as wide a colour spectrum as possible, and then shoot a chart, such as the One shot from DSC Labs or the X-rite chart. These charts are recognised by most grading systems, such as baselite, Davinci resolve etc. The grading software then creates a matching LUT for you. The cameras are then matched automatically.
The great thing about these charts is, the grading sytems understand exactly what colour you are trying to replicate and can match the cameras accordingly. Even if your editor doesn't have an editing system that recognises these charts, at least he or she will have something to go on. By looking at a vectorscope they'll be able to see whether one camera is more red or yellow than the other and adjust accordingly, rather than trying to do it by eye and just guess.
The video below (created by Michael Garber not me) shows how this is done in post.
In conclusion, I'd say you can get away with using the first two methods (using REC709 or better yet one of Ablecine's profiles), if you aren't using one of the cameras as a B camera, shooting an interview. If you are cutting backwards and forwards between 2 shot size on the same subject, you will notice a difference. The only way to get around that is to use the same camera, or use one of the charts.
B4 lenses that were made to work with 2/3 inch chip cameras like Sony's DigiBeta, XDCAM etc had an amazing range, but can you use them on a large senson super 35mm camera?
In short, the answer to this is usually yes, but with some limitations.
B&H stock b4 to Canon adapters as well as various B4 to Sony adapters
Firstly, let's look at why you might want to do this.
A 70-200mm lens gives you a zoom range of roughly 3 x
Canon B4 lenses will do well over 20x. For example the HJ22 will give you something like 30mm to 672mm (so 22 x) and then you have a doubler included on this lens to get you to 1462mm.
As well as having a huge range, B4 lenses also have a servo, for smooth zooms, large focus throws and are parfocal through the range and have external iris control. In other words: they are made for TV.
Considering all this, you might think, why not just buy an old HJ22 or HJ17 and leave it on a S35 chip camera, like a Sony FS7, F5, F55 or Canon C300 and leave it there.
The issue here is that with such a massive zoom range comes a cost: you are shooting through a whole load of glass and this has an effect on the quality of the image. If you want to shoot an interview at say 70mm, your shot will obviously look much much better through a 70mm prime lens, or a 70-200mm zoom than it would though a B4 broadcast lens.
This drop in picture quality from a B4 mount lens manifests itself in several different ways: chromatic aberration, loss of sharpness especially at the edges of lens, flaring and a loss of contrast.
Another big difference between cine lenses and stills lenses versus a B4 video lens is the depth of field. Although a Canon HJ22 might say f1.8 on the iris, it will not give you the same effect as shooting a 50mm prime at f1.8. The reason for this is that crop factor: a large 4 times. Even wide open at 1.8 there is still a pretty big depth of field on a B4 lens.
There are instances when you absolutely need a huge range zoom and this is when converters B4 to PL, EOS, etc are useful. You could of course just use a large cine lens, but the costs will be pretty huge. I have used Arri Aluras several times where range is needed, but they have no where near the range of a B4 mount lens, and a pretty pricey. The Arri Alura 18-80 T2.6 costs upwards of 20k to buy and several hundred a day to rent. If you want a bigger range, the costs go even higher.
So with that in mind, let's take a look at the cheaper option. B4 mount lenses have been around for years, they aren't quite obsolete just yet, as they have lots of uses in sports and news etc, but you can still pick up used ones pretty cheaply.
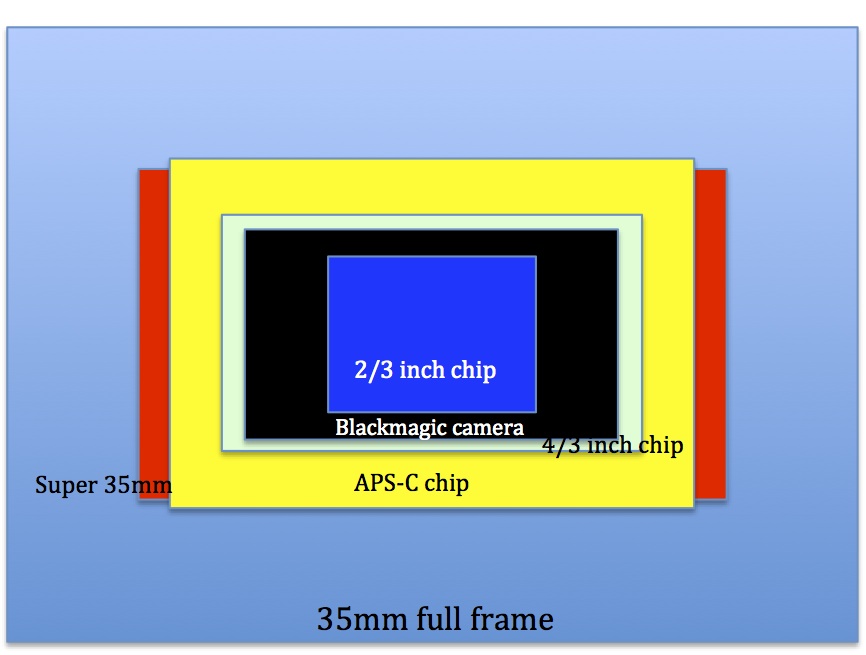
So how do we make a lens built for a small chip camera work on a large chip camera? There is a pretty big difference in the chip size of a 2/3 inch camera and a super 35 sensor. you can find out more about crop factors here.
In the image below I have layered various sensor sizes over each other so you can see the relative difference. If you are looking at this full size (on a desktop computer or ipad) then the images of 4x bigger than actual life size.
In order for a large Super 35mm camera sensor to work on the smaller coverage offered by a B4 lens you need to zoom in, this can be done digitally, if you have a 4k sensor, or you can use optics i.e use the doubler glass on the zoom lens.
Thankfully, most cameras have a centre scan mode, this includes Sony FS7, Sony F5 F55 and Canon C300mkii
The next thing to consider, is whether there is enough room for the B4 mount to connect in front of the camera sensor, without hitting something. In the case of the DSLR, there may not be enough room as it could hit the mirror. If you have a mirror less camera, then it is more likely that a converter will work. Cameras like Sony's As7 range or Panasonic's Gh5 GH4 etc are more likely to work.
Until recently the Canon C300 mkii had no audio when in centre crop mode (as presumably centre crop was only designed with slow mo in mind). Luckily a newfirmware update has solved that issue, so you can no use centre crop mode and shoot at normal speed with audio.

So where can you get the adapters?
Adapters vary depending on the camera they are for, but often they cost well over $1000 so they might be worth renting if you don't see yourself using them much.
MTF are the main adapter makers for this type of lens, although I recently discovered German manufacturer G IB/E optics HDx35 adapter, which my rental company highly recommend. IB/E optics HDx35 convert B4 to PL mount, it looks like a good product, but I haven't tried it first hand.
MTF I have used several times and can be bought at the links below.
B&H stock b4 to Canon adapters
as well as various B4 to Sony adapters
Below Dan Chung from Newshooter.com shows the MTF adapter on the Canon C300 mkii
I have been asked a few times, how to expose LOG footage correctly or "how do I get perfect skin tones when using LOG." Since more and more footage is being shot with various LOG gammas I thought I'd go a little deeper into the subject.
With older cameras everyone shot with a standard non gamma profile, where what you see is what you get. Skin tones were generally placed around 70 percent on a waveform, and to be safe, you'd stop down a fraction to protect your highlights. With LOG gammas everything changed.
Cameras can now record more and more stops of dynamic range, but at present the finished product hasn't changed, i.e. television sets still only show around 6-9 stops of dynamic range. The metaphore often used for this situation is a bucket. Your camera is a large 15 stop bucket which needs to pour its footage into a much smaller REC 709 bucket TV.
So firstly why use a LOG at all if that extra dynamic range can't be used? The answer is really about choice. Protecting the highlights and shooting all of this range in contrast means an editor can keep that information in the grade to create a better finished picture. They can apply a LUT in post which will map the LOG footage to a 709 curve. Highlights, such as a bright sky can be brought down to create a better picuture.
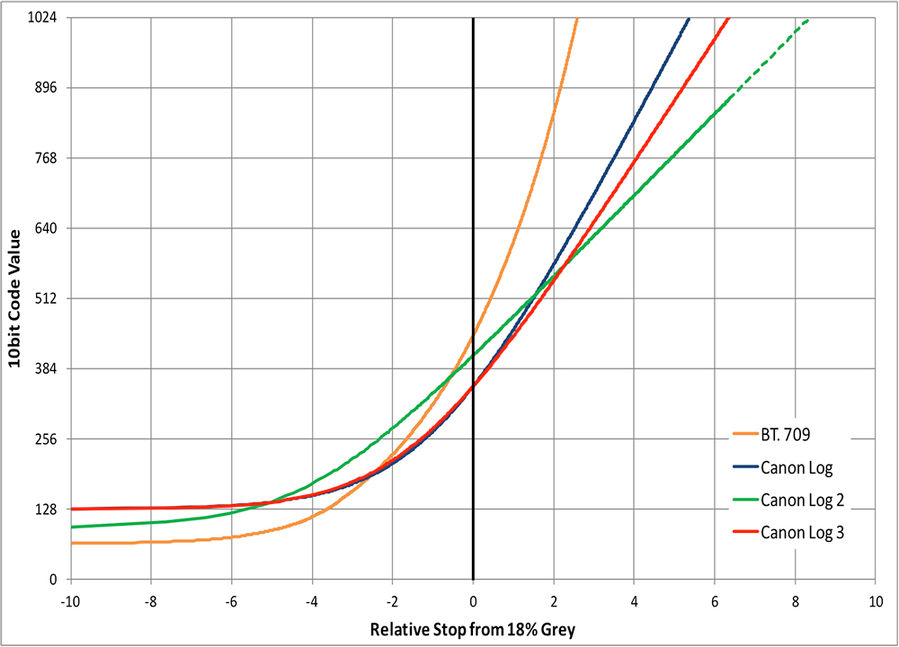
A cameras maximum dynamic range will only be availble when recording in LOG. To give you an example from my camera (Canon C300 mkii), it will record 14-15 stops of DR on LOG2, 13.5 stop of DR on LOG or LOG3 and 11.5 in BT709. So wherever possible I shoot with a LOG curve to give the maximum I can give to the editor. Sony cameras shoot S log, but the curves are essentially doing the same thing.
So how do we expose LOG correctly?
There are a few things you hear all the time on this subject, and these are also three things I'd recommend doing:
1) Expose to the right (meaning to the right of the histogram i.e slight over exposure).
2) Use an 18 percent grey card
3) Send a normal REC 709 curve to the monitor/eye peice and expose that as you normally would
Three diferent methods, so which one is right?
Essentially they all are.
Lets work through these points in reverse order.
3) Send a REC 709 LUT to the monitor/eye peice
A LUT or look up table can be used to give an aproximation of what the footage will look like after a grade. You are still recording in LOG but you can look at a more saturated and colourful image for shooting purposes. It's important to note that you are just overlaying a LUT not applying it, so this is an aproximation of what the footage will look like in post. The reason I bring this up is I have noticed different monitors, eyepeices and LCDs treat this LOG footage with a LUT slightly differently. Sometimes one colour might look slightly odd or different, but it doesn't matter as all the information is recorded correctly in the LOG footage.
This works well in my opinion and it is quick and easy. Many monitors and eye peices have their own 709 curves, or you can apply them from the camera. It's worth testing it out to see if it works well for you. There are lots of ways to test this out, but just expose something using the 709 curve and then flick back to the LOG and you'll be able to see what is happening.
Typically the LOG footage will look under exposed by a couple stops, as it is retaining extra highlights. You could throw in a grey card to the scene as well so you can get a reading of middle grey.
To make this clearer, here is how the above might work. You apply a 709 LUT. You frame up a persons face. You expose that face as you think looks correct. (You could even set the wave form to respond to the LUT footage instead of the LOG) The skin tones will be sitting at about 70 on a waveform monitor that is looking at the LUT. You keep the same exposure and remove the LUT. The wavform reading will drop from around 70 to between 32-38 depending on how your cameras LOG works.
There are other advantages to using a 709 LUT for your monitor. The added contrast helps massively with focus. LOG footage tends to all look a bit grey and wishy washy, adding a LUT will give saturation and this helps (my eyes at least) see what is in focus, somehow the image clicks in and bites when its in focus.
I like to show LUT images certainly to clients and even directors. Some directors are tech savy and happy to look at LOG footage, but for the most part a LUT image is the way to go.
2) Use an 18 percent grey card.
Most LOG curves put middle grey around 32 to 38 % If you want to know exactly, look up the white paper on your particular camera. For the C300 mkii LOG3 and LOG set middle grey at 38% and LOG2 is at 32% Sony's S logs are usually pretty low around 32% If you aren't sure, just try it out. You could set the monitor to 709, expose a grey card by eye to what you think it should look like, then flick on the LOG curve and waveform and see where it sits. Chances are that grey will sit somewhere around that 32-38 level.
This is also very useful for nailing correct skin tones. Slightly tanned caucasion skin is going to sit at 18 percent grey. You can use your judgement to get your subject exposed correctly. You can allow a very pale skinned person's skin to sit higher than this on a wave form and very dark skin to sit slightly below this level.
1) Expose to the right.
Okay, so from the two points above we know we are going to be essentially underexposing our LOG footage as compared to REC 709. However, "expose to the right" means over expose! So how does this work?
Colourists find it easy to pull down highlights than to lift stuff from the shadows. The reason for this is that under exposed LOG footage often gets grainy or noisy when you try to lift in post.
So why should we expose to the right?
This comes down to how the camera deals with information. From middle grey up to maximum white, cameras have large amounts of room to store data. A cameras sensor has a certain number of steps per channel and will distribute these steps favouring the top end of the scale. It therefore makes sense to use this section of the scale to record our most critical peices of information - hence "expose to the right"
So the we need to use our judgement with the term "expose to the right." If we have a dark scene with no highlights and a face is our subject, we can afford to expose to the right, as we won't lose any highlights and we will be setting our exposure where the camera records lots of data. If there are many highlights we need to preserve, then we should set our exposure accordingly.
A quick word on ISO and correct exposure.
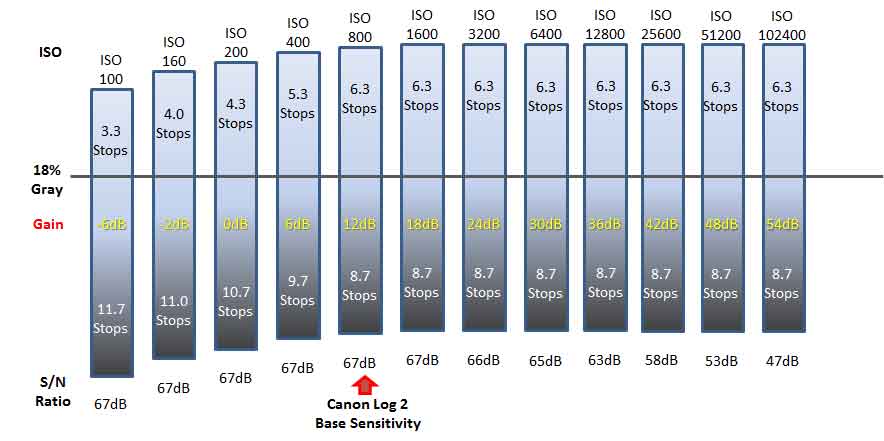
The image above is from the Canon website, which has several white papers on the their cameras and is well worth a look.
As you can see from the image above base ISO for the Canon C300 mk ii is 800. Interestingly as the ISO is lowered the number of stops available over middle grey are also lowered. With this in mind, it would make sense to lower exposure using NDs in bright situations, rather than simply lowering the ISO.
It's also worth pointing out that LOG curves don't usually work well in low light. This makes sense when you think about it. LOG is very good at preserving highlights when you have a scene with high contrast. However, in a low light scene you have very low contrast, so it makes sense not to use a LOG curve in this situation. LOG2 in particular starts to look noisy when you push it above its base sensitivity.
I would advocate turning off LOG altogether when shooting in low light, but I know many have reported good results when shooting the original LOG1 in low light.
With the latest firmware, Canon have made slight alterations to LOG2 and the have added LOG3, so which is the best LOG to use?
Shooting with a LOG curve is becoming more and more common as editors get more used to applying LUTS. I often used to shoot with a picture profile that took very little grading for fast turn around shows, but these days almost everyone seems happy to receive LOG footage, but which LOG curve to choose?
From now on I'll be switching from LOG2 to LOG3, here is why.
If you are looking solely for high dynamic range, then LOG2 is the curve for you. For high contrast bright outdoor scenes the LOG 2 curve works really well. I always shoot the LOG2 Cine Gamut preset if using this LOG, as the Cine Gamut gives the greatest colour spectrum for grading. Although it is tougher to grade from scratch, dropping the appropriate LUT on gets the editor most of the way there.
However, there are issues with LOG2, and I wouldn't recommend it for all shooting situations.
Before LOG 3 was available I shot a series of interviews against a dark grey background. I noticed that these dark areas had a fair bit of noise in them once the LUT was applied. This is something that Canon have rectified with the latest firmware upgrade and LOG2 is now less noisy in the shaddows.
I recently saw some of my LOG2 footage being graded in a soho facilities house by a top colourist. His comments were that:
1) His favourite footage to grade was always from the Ari Alexa.
2) He often found Canon footage to have some grain in the shaddowed areas
3) He advised always exposing to the right, as it is a lot easier for him to bring down exposure, than to bump it up.
No suprises there I guess, however, I was still concerned about the grain/noise in the shaddows.
Incidentally, the footage was shot at native 800 ISO, so I wasn't expecting much noise at all. When I looked at the footage on my IMAC it looked pretty clean. However, Imacs are consumer products aimed at making everthing look as nice as possible. This is not true of 4k monitors in grading suits, these are correctly calibrated and can highlight any issues with noise.
I decided to do a few basic tests to see what happens with the noise on the different LOG curves. I set a grey card up lit with an even light from a kino flo and put a white card and black next to it as a reference. The camera was set to native 800 ISO and I tried out various exposures.
Grey was placed at 39 % for LOG2 and 32.5 % for LOG 3 (Incidentally exposure did not need to be altered in order to achieve this shift in values)
The LOG footage itself looked pretty clean on all LOG curves, but applying a LUT caused a bit of grain in the shaddows. I had expected this, as the LUT is essentially bringing up the levels by a couple of stops.
With the LUT applied and at 2 stops and more under exposed, there was some noise when using the LOG2 curve, but the LOG 3 curve looked less noisy.
For many situations I would prefer to trade the extra stop of dynamic rage gained by using LOG2 for the cleaner shaddow areas that LOG3 provides.
The original Canon LOG is still available and is probably closer to LOG3 than LOG2. I would now really only use LOG1 to match the original marki C300.
Here is my video review of the Zacuto recoil rig and their new EVF, the Gratical Eye. There are more details and pictures below.
The first camera I used professionally was Sony's Betacam SP. It was well balanced, it sat perfectly on the shoulder, you could zoom in a shoot things far away without wobbling. Over the years, camera image quality improved, while camera ergonomics went backwards.
After a few years we all found ourselves buying boxes for cameras. Being able to produce near cinema quality images is nice, but not if your rig is wobbling around on your shoulder and you can't see if the shot is in focus.
This is where Zacuto have stepped in and created something that really works.
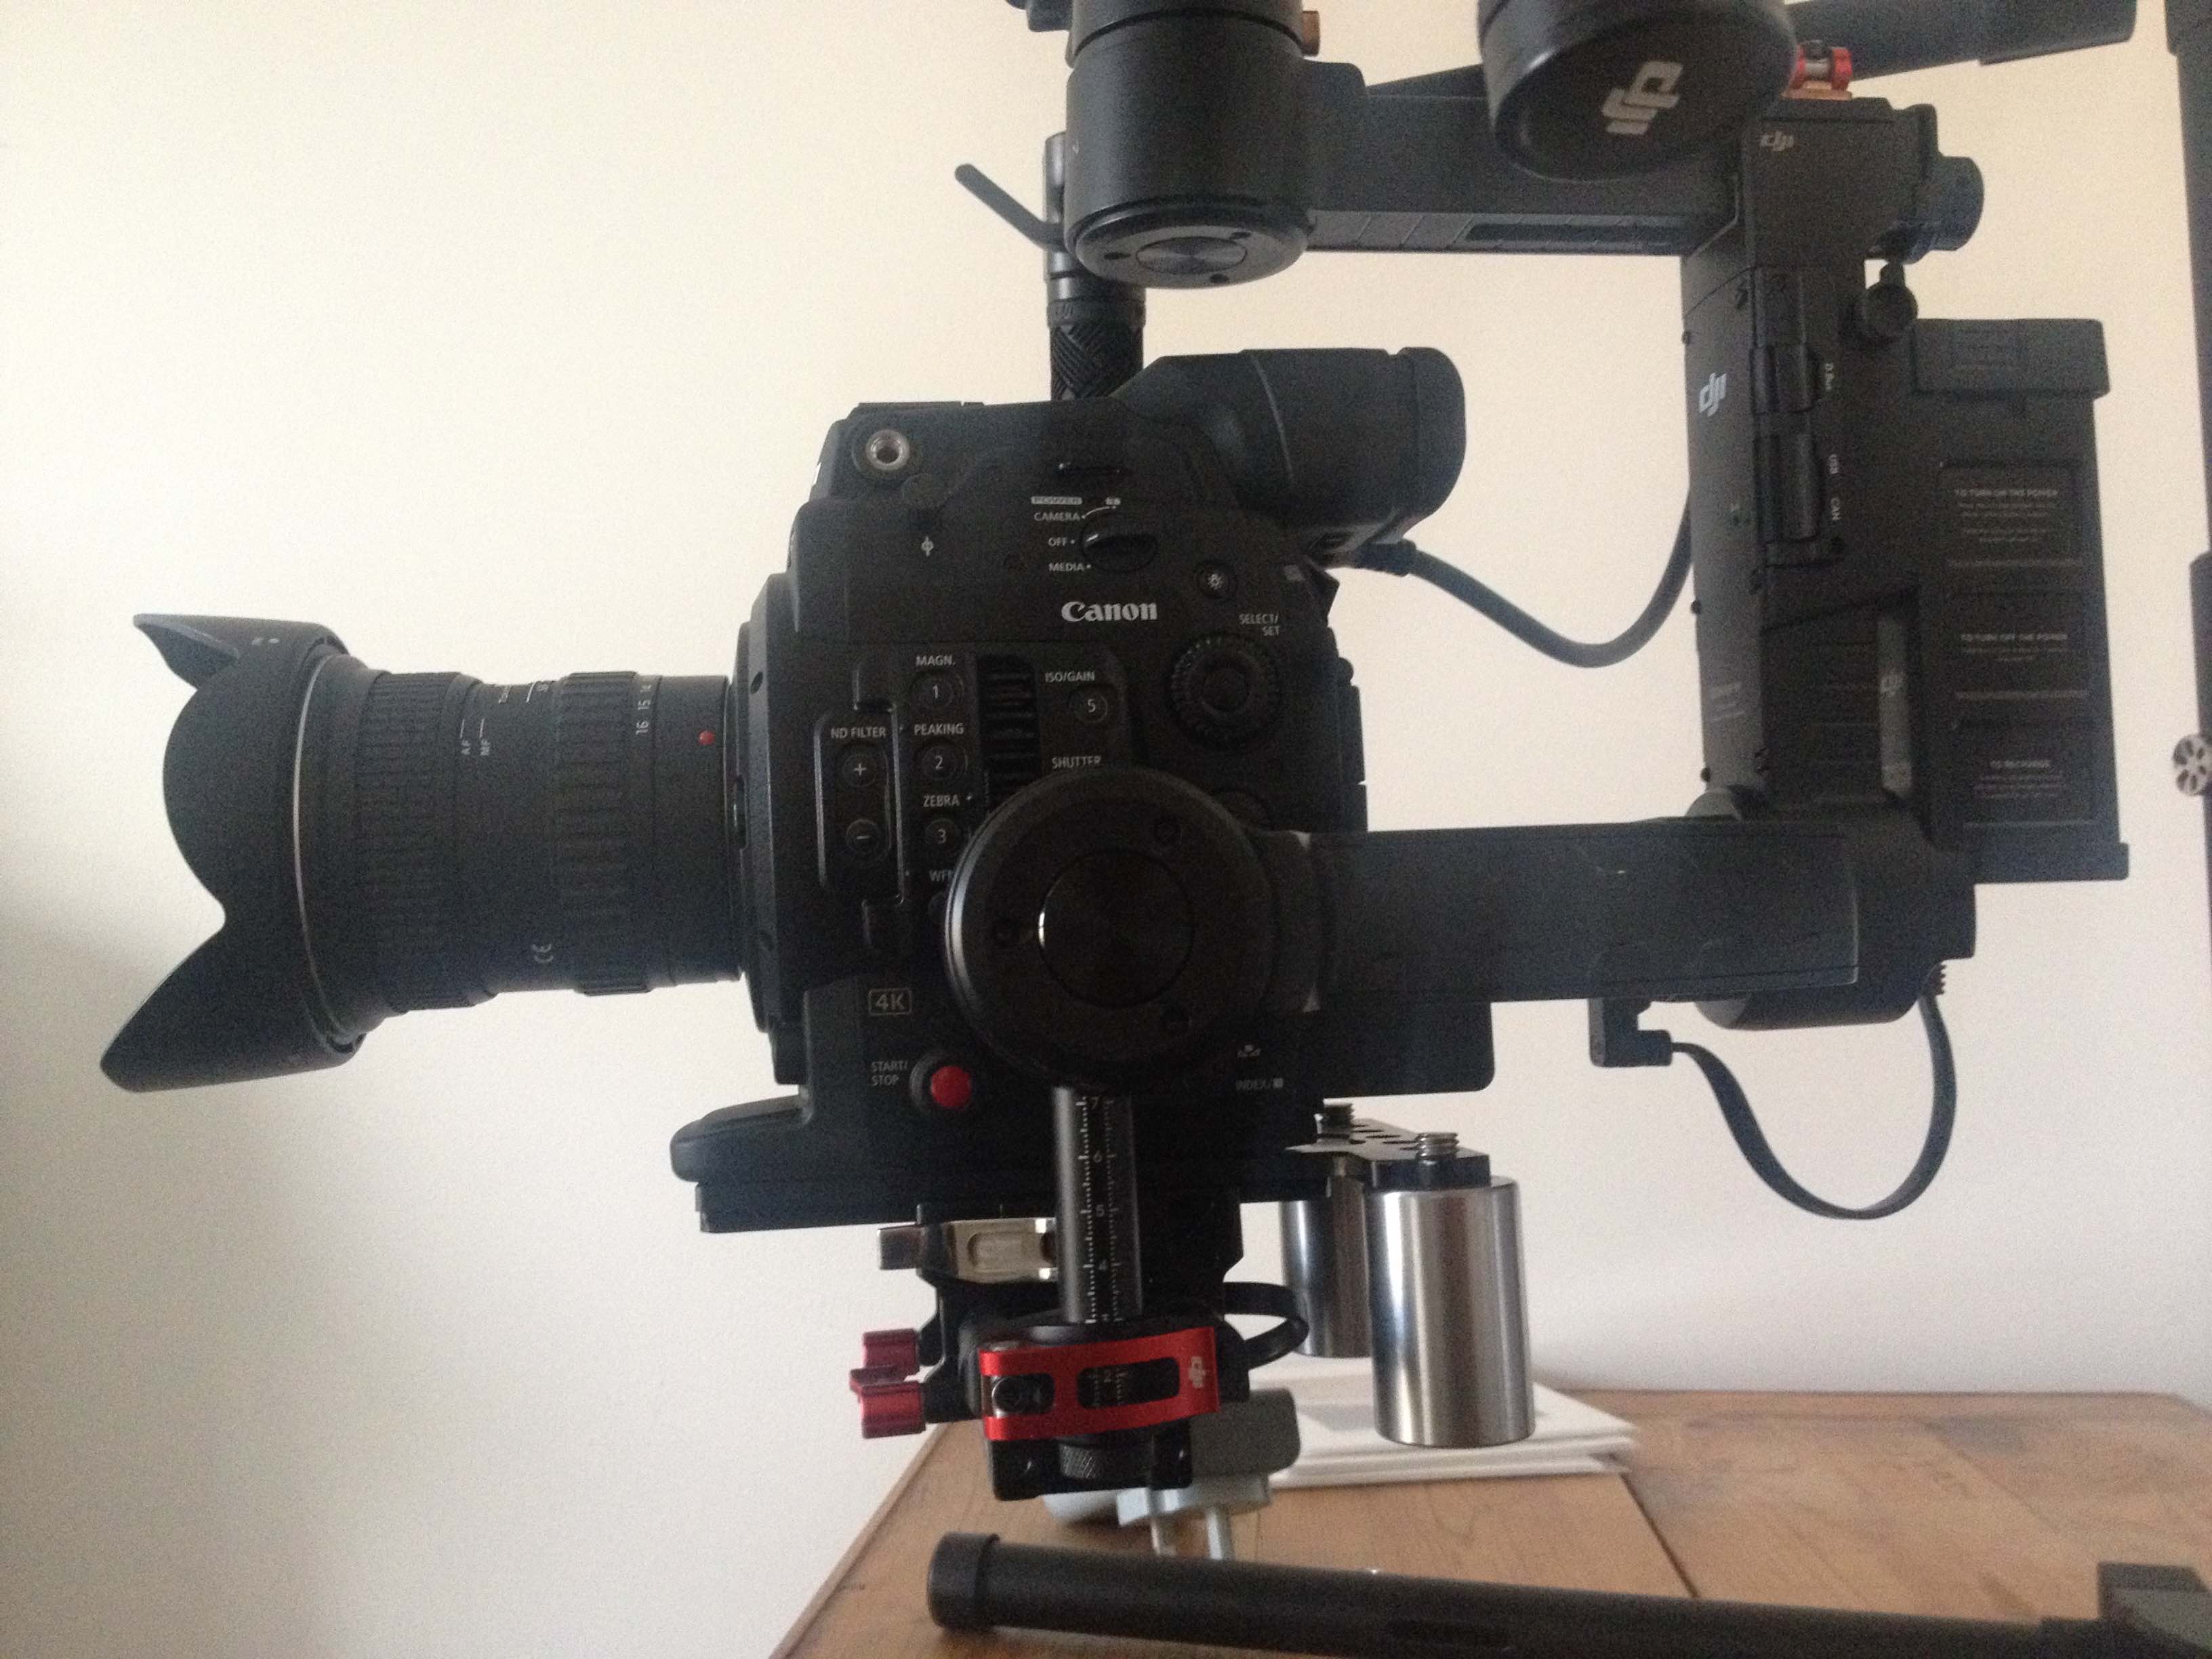
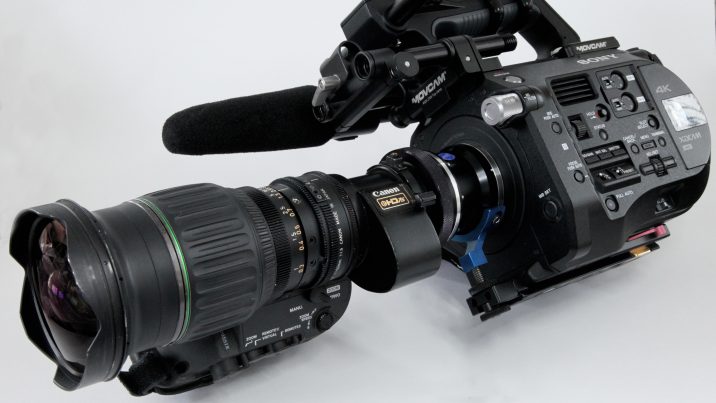
The recoil rig itself is pretty versatile. It has a really long plate and can be used with most cameras out there. Here, I am using it on the Canon C300 mark ii, but it fits nicely on to the Sony Fs7, F5/55 etc.
The Canon C300 range has always been a bit odd ergonomically, at least to my mind. It is a really top heavy camera, and all of the inputs you would expect to be at the back, like the audio XLRs, are at the front. Zacuto have managed to sort this out by relocating the LCD module and pushing the Canon side grip forwards.
The recoil rig works much better than I thought it would. The unit really fits snuggly into the shoulder and makes on the shoulder shooting so much easier. With my old rig, I would tend not to shoot with lenses longer than 50mm. Now I put on longer lenses and feel a lot more comfortable.
The quality of the engineering and workmanship on this thing is amazing. Everything is built to last. Nothing at all is plastic.
The Gratical Eye itself is awesome. I love how small this thing is. Zacuto have taken away a few of the extra ports you get with the Gratical HD, to give a much more stripped down model. The Gratical Eye is powered externally from a D-tap into a lemo connector, and the image comes from an SDI cable, and that is it. It makes the viewfinder much smaller, and to my mind much better.
As with all Zacuto EVFs, it comes with an absolute tonne of features, including, LUTS, false colour, peaking, scopes. The scopes can even be switched between monitoring the LOG footage and the LUT.
The quality of the image is really good. There have been a few shots, where looking at the LCD monitor I have thought details were being lost in the highlights, and then looked into the Gratical Eye and seen what is really going on, and have been pleased to see detail is still there.
Overall I would say this is a very high quality piece of gear that I can imagine owning for years and even swapping onto new rigs in the future when my current camera becomes obsolete. Although it certainly isn't cheap, the Gratical Eye is a bargin when you consider the price of a dedidicated EVF from many of the major camera manufacturors. The beauty of the Gratical Eye being that you can use it on any camera you choose. As for the recoil rig, you get what you pay for here, its solidly built and will last years.
NB Ethics statement: If you buy a product from the Zacuto product links above, I receive a small commission. My review of products on my site is based on what I think. If I thought this product was bad, I would say so.
I recently bought the Canon C300 markii and thought I'd share some of the footage and some first impressions here.
Although the markii has the same form factor as the original C300, it immediately feels a lot more solid. The camera itself is slightly larger and built from stronger material. The first big difference is the handle. This is so much sturdier than the original. Rather than having one small screw to fix the top handle, there is now a much more robust solution. The handle is fixed with two thick screws to a plate, which is then fixed with three further screws to the camera. On the whole this is great. It means you can now pick up the camra with confidence, no matter how big your lens or other accessories. The only downside to this is that it does take a while to remove the handle as there are now five allen key screws to remove. Still, a small price to pay.
The cables running from the LCD to the camera can now be fully removed, which is a major improvement. Also, one cable is for audio and the other video. This is another big advantage for gimbal users, as you can now mount the LCD monitor with just one cable fairly efficiently.
The big change with mark ii really comes when you start looking at the images coming out of the camera. I already liked the image I was getting from the C300 but the markii really impressed me.
The dynamic range is something that immediately jumps out at you. One of the first things I shot with this camera was inside a dimily lit cafe and the sun was absolutely blasting through the windows. The camera handled it so well. I used Log2 Cine gamut, which gives a slightly flatter image than the orignial Canon Log. I know pretty much nothing about colour grading, so I simply slapped the appropriate LUT on. I thought the LUT was a bit intense and made everything a touch to contrasty. I then backed off with the LUT to 50 percent and left it at that. There is a lot more that can be done to grade the image, but I just wanted to put this up as is, so you can see what comes out of the camera. The shots using Clog 2 are at the begining part of the video above.
The shot below is a jpeg screen grab from an ungraded shot, using BT2020.
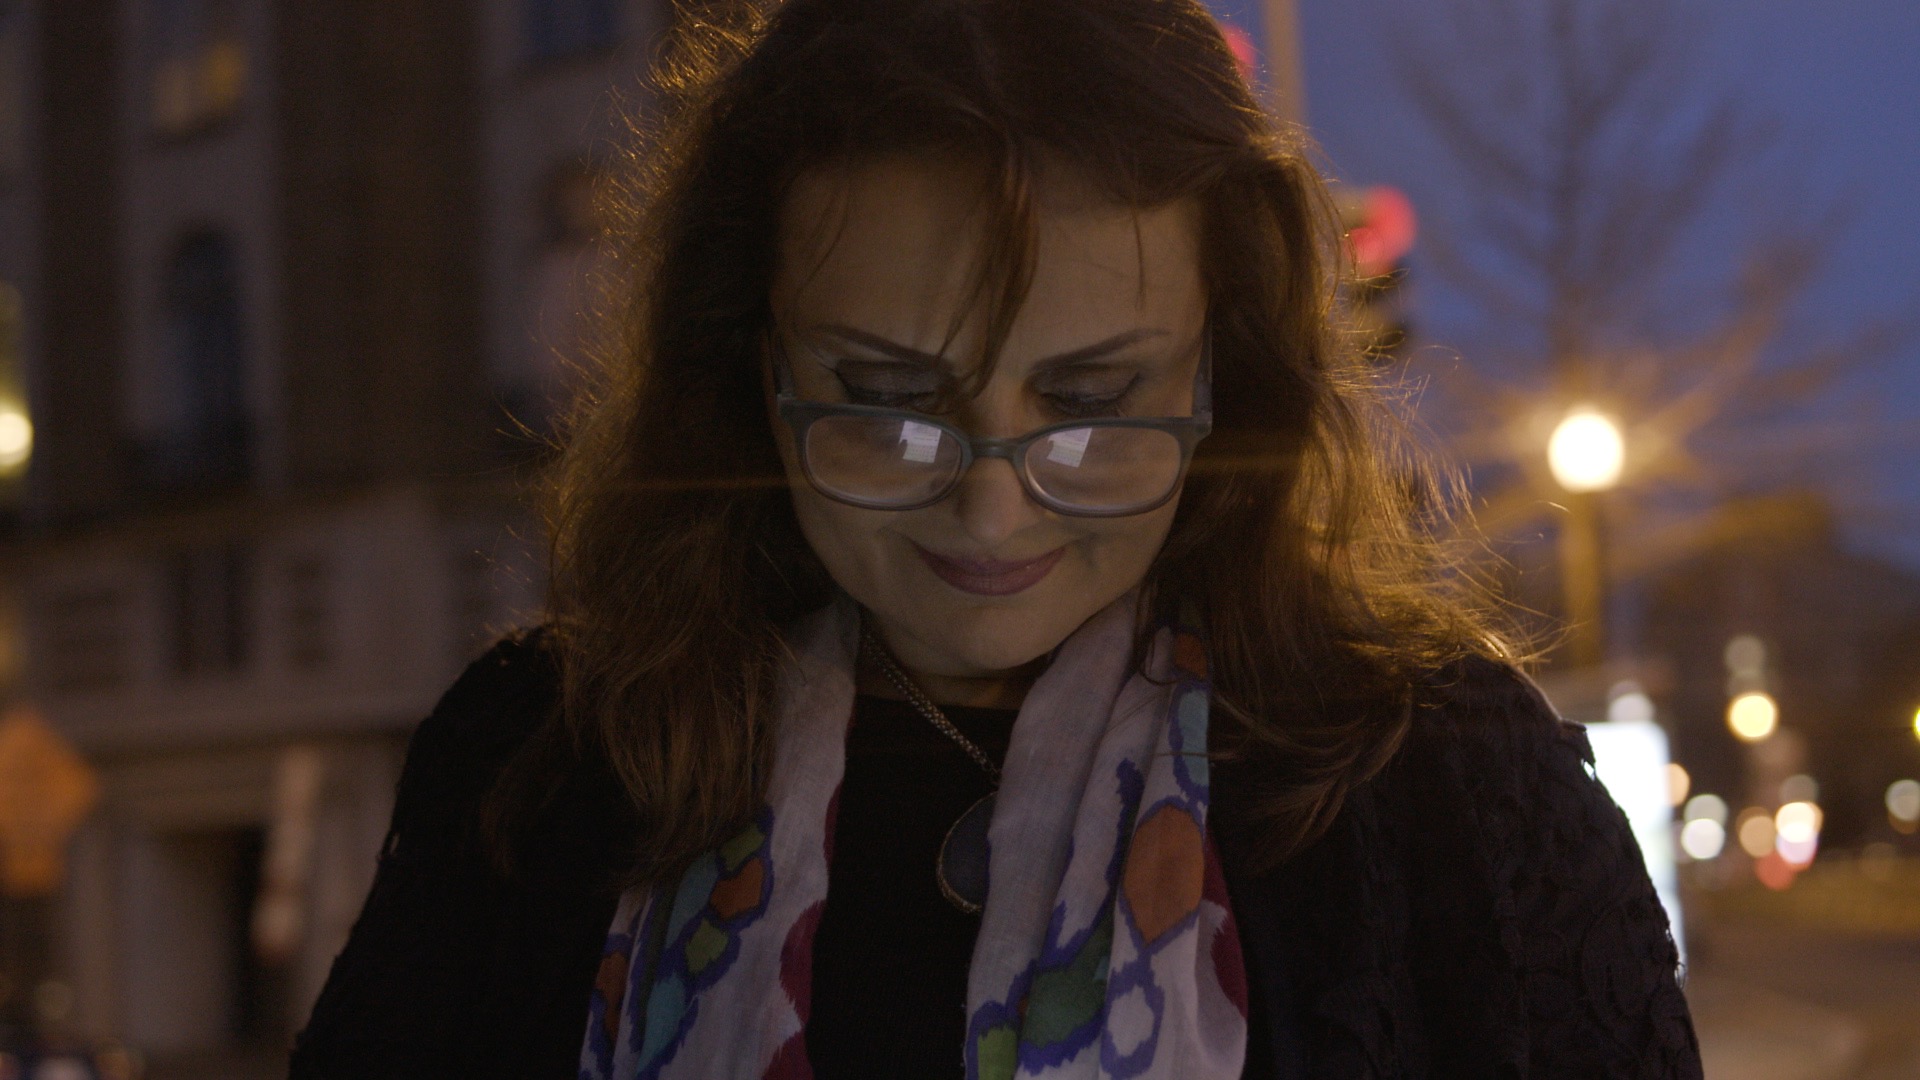
The next thing, which I just couldn't believe was the low light ability. I was tentaively going higher and higher with the ISO expecting to see grain and digital noise and it just didn't happen. I was shooting with the camera on a Ronin, so I didn't want to shoot with the lens wide open. In order to have half a chance of getting anything in focus, I decided to stop down and use the ISO. To further complicate things I was shooting half speed at 50p and 120 shutter (we were in the USA, hence 120 rather than 100).
The shot above was taken at night a couple of hours after sun set. The only light illuminating the face here is from an iphone.
The lens flares are deliberate. I was using my Leica 35mm lens which flares like crazy if you don't use the hood or matte box. I personally love it, so use it as an effect.
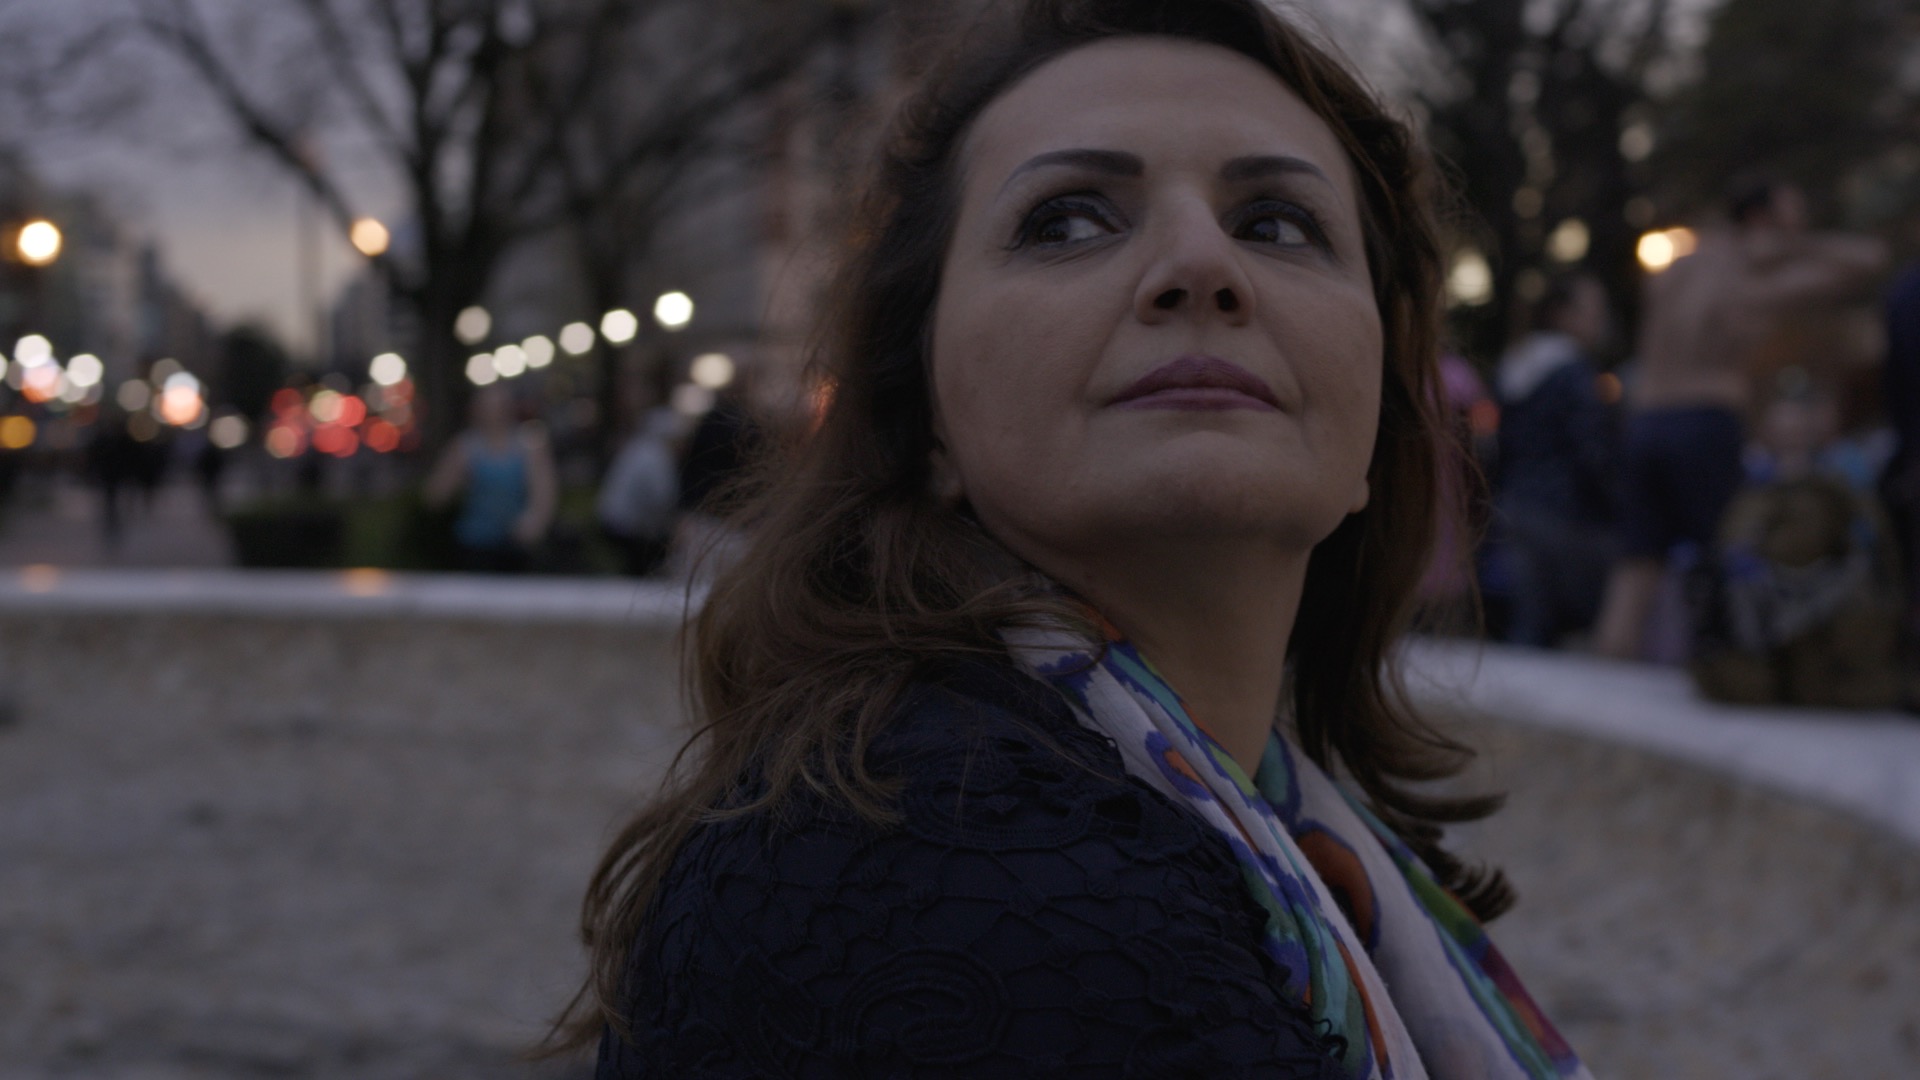
The shot above was taken just after sunset. Again there is no lighting here. Despite the lack of light, I really like the natural look of the image, it could certainly benefit from a grade, but I am pleased with this as a starting point. This is an image straight out of the camera with no LUT applied. For all the night time shots I didn't use LOG but shot with the BT2020 profile. This gives a decent amount of dynamic range and requires less work in post.
One of the feature I was keen to try out was the face tracking and focus. Since all of these shots were taken on the Ronin, I wanted to see if auto focus or assisted focus was possible. I found that, to my surprise, the face tracking and focus worked pretty well, with a few caveats.
The face tracking does work and the focus is smooth enough to use. However, it really functions best in decent light conditions. In daylight, or if you are lighting your subject well, the face tracking quickly picks out a person and tracks them. However, in these dark street scenes, where the director did not want any lighting, the face tracking struggles to see the face.
Another issue is that the auto focus does not work at all in slow mo. I found the best way round this was to shoot in 50p and then conform this to 25p in the edit, which gives you your half speed, but keeps the audio and the auto focus features.
A funtion that I really like was focus assist. If you are using a Canon lens, the camera is able to tell you whether to pull fowards or back to acheive focus. This was amazingly useful, particualarly when the camera was on the ronin. Even if you are using peaking, it's really tough to see what is in focus when you are running around with the ronin, but the focus assist really made it easy.
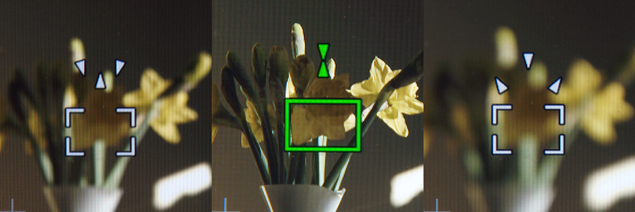
Often I would set the focus at a distance I wanted to be from the subject, and then turned on focus markers. Depending on whether the two triangles are above or or below the single triangle, lets you know which way to pull (or move). On the left shot the focus is set towards infinity and the focus is behind the flowers. In the shot on the right the focus is set too close and the focus is infront of the flowers.
This was particualarly helpful on the Ronin, and I would just move the rig closer to or further away from the subject.
It is also very useful in an interview situation if you are shooting at a wide aperture and your subject is moving backwards and forwards a bit. It is nice to have control of the focus yourself so you can decide if you want to pull focus or not.
The only thing I didn't like about the focus was that the digital zoom in now doesn't work once the camera is in record mode. This seems like a step backwards to me. This will apparently be fixed in the next firmware update. For now, I just need to learn to trust the focus guide - so far they have been amazingly accurate.
A reader of the blog wrote to me with a few questions about working as a cameraman. I thought I would publish my answers here.
1) What is the most difficult part of your job?
This is easy to answer. It's the freelance juggling act. Jobs flow in, all of them will be "pencil bookings," unconfirmed jobs. Many of these jobs will overlap, some projects will be better than others. The hard part is choosing the best jobs for your career, and the jobs you think are most likely to actually happen. All of this has to be done without offending Producers and without messing up their schedules.
2) Whats more important, a creative mind or technical knowledge ?
On the whole, Producers and Directors are looking for a balance of both of these skills. On a larger project you may have an Assistant or a Gaffer and you can rely on these people for technical camera knowledge and lighting respectively. However, on a smaller project you will need to be technically savvy. Often people will look to you for technical knowledge, Researchers, Assistant Producers and even Directors are all now starting to self-shoot. They will often come to the DoP for help and technical advice.
Also, sometimes you could be shooting miles from anywhere with no tech support and no rental facilities. If you run into technical difficulties of any description, having someone that can step in and help will always be a plus to a Director.
3) How long do you spend on planning and preparation before going on set?
This one varies massively, depending on the job. Some jobs I might get a phone call the night before, I turn up on the shoot with almost no idea of what to expect. At the other end of the spectrum a Director might call me with an idea, or a potential shoot. Initial conversations might be about budget, equipment, logistics, or what can be achieved in the time available. This might go on for months, then one day the shoot happens several months after the initial conversation.
Reading this, you might think this is a lot of prep and forethought for a job that might not happen, and you'd be right. However, Directors are often in need of this support. Of course, they might have a Production Manager who can find out whether you can travel around Africa with a jib, or how much it costs to rent a certain bit of kit etc. The reason a Director might rely on a Cameraman for this kind of research is that you may already have experienced theses situations before. Years of travelling around filming things gives you experience and knowledge that can't always be looked up on the internet. It is this first hand knowledge is often vital in the early planning stages of a shoot.
4) How far does your degree take you when applying for jobs?
When getting work as a cameraman, it is your experience that counts, not your academic achievement. However, entry level positions such as Runners or Junior Researchers are always oversubscribed, so any advantage you might have over others is a good thing. Languages are often useful, as is specialist knowledge. If a programme is being made about Machu Picchu and you studied Spanish and Ancient History at University, then you are more likely to get hired than the next person.
The connections you make at university might also be useful. If a director is looking for an Assistant Camera Operator and you happened to go to university with them, you will stand more of a chance than others.
This might sound unfair, and it is, but in film and TV the old adage about "it's not what you know, it's who you know" is very true. Think of if this way: the industry is based around trust. People are agreeing to pay for your skills, before you have proved your worth. For this to work, they need to trust you are good at what you do. People tend to trust people they know, or their colleagues know, over strangers.
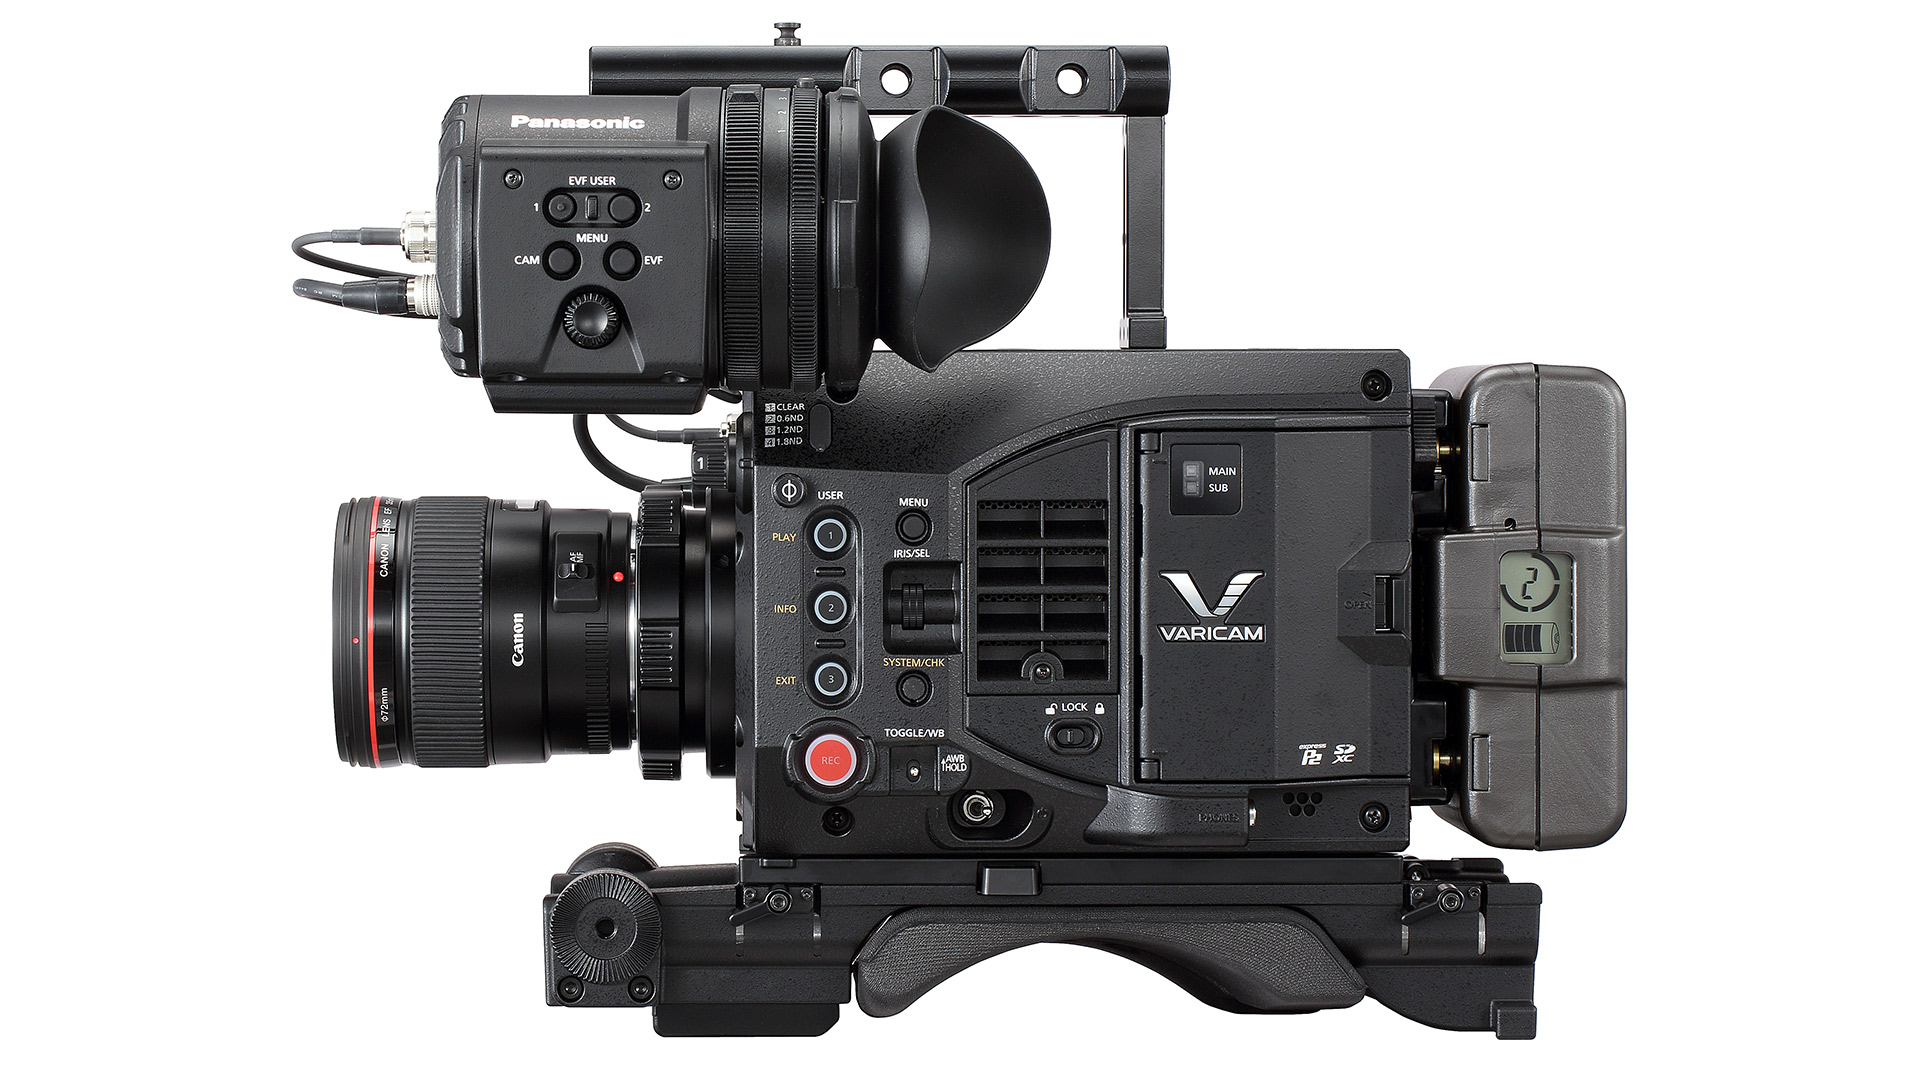
There are so many different cameras coming onto the market at the moment, I thought now would be a good time for a brief overview of what is out there. Here is what you get for your money.
| Make |
Model |
Price USD
|
4K |
Slow mo |
Colour |
| Sony |
A7Sii |
3,000 |
Y |
120@HD |
4:2:0 |
| Sony |
FS5 |
5,600 |
Y |
240@HD |
4:2:2 |
| Sony |
FS7 |
8,000 |
Y |
180@HD |
4:2:2 |
| Sony |
F5 |
16,500 |
Y ** |
180@HD |
4:4:4 |
| Sony |
F55 |
29,000 |
Y |
180@HD |
4:4:4 |
| Canon |
C100ii |
5,000 |
N |
60@HD |
4:2:0 |
| Canon |
C300ii |
16,000 |
Y |
120@HD* |
4:4:4 |
| Black magic |
Ursamini 4.6 |
5,000 |
Y |
160@HD |
4:4:4 |
| Panasonic |
VariCam 35 LT |
18,000 |
Y |
240@HD* |
4:4:4 |
| Panasonic |
VariCam 35 |
55,000 |
Y |
120@4K |
4:4:4 |
| Arri |
Amira
|
40,000 |
N |
200@HD |
4:4:4 |
| Red |
Raven
|
10,000 |
Y |
240@HD* |
Raw |
| Red |
Scarlet dragon |
26,000 |
Y |
150@HD |
Raw |
*Crop sensor
**With upgrade
It wasn't that many years ago when there was really only one choice if you worked in TV, you bought a Beta SP camera and that was that. These days the camera options out there are mind blowing.
This table only represents a small fraction of what is out there. I have hardly touched on the options from RED. This is because, firstly the article would go on forever as there are so many options, and secondly, because most of the RED specs go way beyond the specs set out in this table (as do the prices).
Sony have historically been pretty much alone in this market. Canon then made a suprise entry with the 5D markii, eventually following it up with the Cinema EOS range. The Canon C300 was a massive hit for Canon and so Sony have struck back.
If you look at the C100 markii and then compare it to the Sony FS5, the price is pretty similar, but the Sony blows Canon out of the water on the specs.
The next model up, you look at the C300 Mark ii and the Sony FS7 is half the price, but has better slow motion. The C300 ii does have a nice look straight out of the box in my opinion, but again the Sony is half the price.
New to the market is the Ursa mini 4.6K. This isn't even availble to buy yet, but in the specs for price war, its looking pretty strong. Aimed right at that mid range where vast numbers of cameras are sold, it looks like a steal at just 5,000 USD.
RED produce a lot of cameras that are well above this mid range price. The brains themselves aren't too bad in terms of price, but the cost really starts to add up when you tack on the accessories to make it into a fully functioning camera. The new Raven however goes for just 6,000 USD for the brain. I put 10k in the table above as that is the basic packag to get you up and running.
Arri have also brought out the Alexa mini and the Amira, although still expensive, the prices are lower than the Alexa. The offerings from both Arri and RED will certainly tempt camera buyers in the mid range to pay a bit more to get top end pictures.
So what to choose?
At the top end 30k + will get you a Sony F55, An Arri Amira (or an Alexa Mini) or A good setup with many options for RED.
At the mid range 16k will get you a C300ii or RED Raven or a Sony F5.
Below that price there are a massive range of cameras, many of which have specs that out perform cameras in the 16 k bracket.
In the end it comes down more to functionality and usability than specs. If you need to mount the camera on your shoulder and access all the necessary buttons quickly then ergonomics are going to be more important than just specs.
The other issue is production work flow. If you need to get your camera onto lots of jobs where there is a production workflow already in place, then this needs to be considered. As you go up the price range, cameras will spit out whatever codec you ask them to. This is where spending more money on a more versatile camera could save you money in the long run.
Working as cameraman, we are often alone in our craft, in the sense there is usually only one of us on the shoot. There is rarely another shooter there to bounce ideas off, or learn something different from.
One of the site's readers, Oli Cohen, remarked that he found it hard to find a mentor working as a DoP. With this in mind I thought I'd write down a few places where I have found peices of inspiration.
I'll open up a comments section below and you can add your ideas too, but in the meantime just email the site at This email address is being protected from spambots. You need JavaScript enabled to view it. . Hopefully we can get a bit of a list going. This could be any place you find inspiration for your filming style, whether that be people you follow on Twitter, Instagram, Facebook, websites you go to, books that you read or films that you watch.
Here are a few places I use to start us off.
Instagram
 @ericsteelberg ASC
Eric Steelberg shot Juno and Up in the Air. His Instagram feed is full of interesting shots taken on and off set.
 @rpstam
rpstam is Rodrigo Prieto who shot The Wolf of Wall Street
 @chivexp
Chivexp is Emmanuel Lubezki. Recently he has been posting lots of stills from the movie Reverant. He also shot Birdman, Gravity, The Tree of Life, Children of Men and Y Tu Mama Tambien.
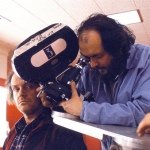 @behindthescenes10
This is a fun one to follow. There are some amazing on set shots on this account from all kinds of movies. If you want to see Jack Nicholson goofing around on the set of The Shining with Stanley Kubrick, this is a place to get it.
 @eduardgrau
Edu Grau shot A Single Man for Tom for when he was 27. Yeah 27, makes you feel slightly sick doens't it. Anyway, he is good to follow and often post slightly odd, stark, but beautiful shots.
 @rdhardy
Rob Hardy BSC British Cinematographer who shot Ex Machina. This feed has some fantastic looking shots that all have a certain specific style to them.
 @reedmorano
Really beautiful shots on Reed Morano's feed. She is the only woman on this very male dominated list, in what I guess is a very male dominated profession.
 @papa2
Phedon Papamichael shot the superbly charming and beautiful film Nebraska.
 @Rogerdeakins
Roger Deakins doesn't need much of an introduction. He has worked with The Cohen Brothers, Sam Mendes.. He shot Shawshank Redemption, Skyfall, No Country for Old Men, True Grit, Fargo, Oh Brother Where art thou, The Big Lebowski, to name just a few.
Websites
Here are a few DPs who put out lots of interesting and useful information on their own personal websites
Roger Deakins
www.rogerdeakins.com
The world's favourite DP Roger Deakins has his own site where is unbelievably helpful and friendly offering advice and help to those who comment. I am not going to list his credit, you know what he shot.
Shane Hurlbut
www.hurlbutvisuals.com
Shane Hurlbut is often setting up some crazy test to see whether one lens is better than the other. He puts a huge amount of work into these and is good about sharing his information and communicating with his readers.
This list could go on and on, but I think I'll leave it there and ask you about where you find inspiration or mentors.
Still in need of inspiration? Check out the film below of DoPs on the craft of Cinamatography.
{vimeo}70582577{/vimeo}
Lenses vary hugely in price, so what do you get for your money?
Let's take a look at a few 50mm lenses. 50mm probably the most commonly used lenses, manufacturers sell large numbers of them, and every manufacturer makes a 50mm, so it is easy to compare them.
This is by no means a complete list of all 50mm lenses, but just illustrates the price difference.
|
Lens
|
Price in Dollars |
|
Stills
|
|
|
Canon 1.8
|
125
|
|
Canon 1.4
|
349 |
| Zeiss 1.4 |
725 |
| Canon 1.2 |
1349 |
| Cinema |
|
| Ziess CP2 1.5 |
4500
|
| Canon CNE 1.3 |
4950 |
|
Cooke s4 mini 2.8
|
7300 |
|
Arri Master Prime
|
21000 |
As you go up the price range two things change, the housing that the lens is in and the optical quality of the glass.
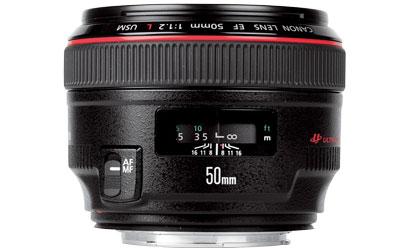
The Canon 1.8 is so cheap, it isn't fair to criticise the lens, for what you pay it is a bargain. However, the housing is light weight and plastic, the focus ring is so small that it is very tough to use. This lens is really designed solely for photographers using auto focus. I have seen people using these lenses for video, but I would only advise it if you are on a really tight budget.
The Canon 1.4 has a better focus ring and is easier to use manually. The housing is slightly better than the 1.8
The Canon 1.2 is an L series lens, so the housing is weather sealed and a bit tougher. Through the canon EF range, the more you pay the faster the lens becomes.
If using a lens for video, I would choose the Zeiss 1.4 over the Canon 1.2. Zeiss make a good solid metal housing for their lenses. The focus throw on the Zeiss is also larger than on the Canon lenses, which makes manual focusing much easier. Zeiss lenses also hard stop at infinity. Canon EOS lenses are designed with auto focus in mind, the focus ring will circle around forever, pushing a touch past infinity and then you have to bring it back. With the Zeiss lens, if you just roll it all the way and infinity is where the focus barrel stops, altogether much better when you are filming. Leica is another lens similar to Zeiss in this aspect, and also similar in terms of cost and build quality. The image of the Leica and Zeiss do vary, but which you prefer is down to individual taste.
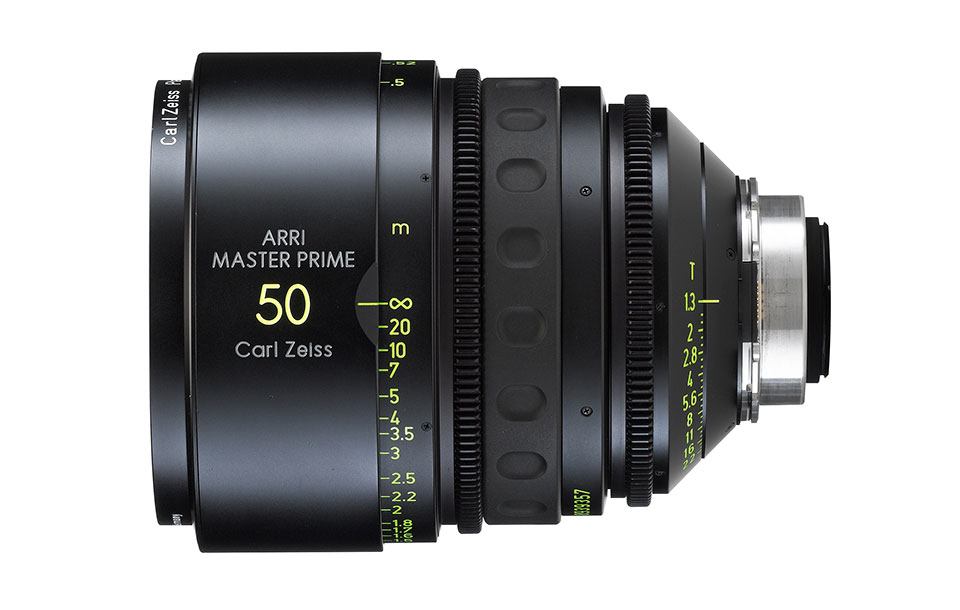
The Arri Master Prime
The next set of lenses are a big step up both in price and the quality of the housing. Zeiss Compact Primes have been around for a while and in a similar price bracket are the new Canon CNE range. One of the things you get at this price range is uniformity. All of the lenses in these sets are roughly the same length and barrel size. This means changing lenses is quicker, as there is no need to adjust matte boxes or moose bars as you may have to with stills lenses, which all tend to vary in size. Another big change is that the iris control is alway on the lens itself, this is obviously a massive plus when shooting. The distance marks on the lens are accurate and the lenses can be easily used by a focus puller. (Stills lenses are really tricky in this regard as you can roll the focus around indefinitely and loose all of your focus marks.)
So how much should you spend on your lens if looking at the housing and mechanics alone? This really depends on what type of work you do now, or see yourself doing in the future. If you think you'll be on a film or commercial set then spending the extra to get the dedicated lenses could be a good idea.
If you are a solo operator and don't see yourself using a focus puller very often, the decision is a bit more difficult. Having a big focus throw and an external iris wheel are very nice, but they aren't essential, and you also have to deal with the added weight.
So what about the quality of the glass and the image you get from the lens? At the lower end of the cinema lens range, the quality of the glass is very similar to the optics used on the top end still lenses. For example the Zeiss CP2 are close to the Zeiss ZE and ZF stills glass, and the Canon CNE range is similar to the L series EOS lenses. There are however a few differences. You tend to get much more dramatic lens flare on the cinema lenses, simply because the lens is that much bigger on the front end. I have also noticed the Canon CNE lenses create very round out of focus highlights, whereas the still lenses have an octagonal shape to them, and that is due to the larger number of iris blades on the cine primes. It is said that the better quality glass is cherry picked for the cine lenses and that these lenses are also given better coatings.
There are also clear differences between manufacturers and the type of image the glass produces. Generally speaking, the more you pay the less the lens breathes, contrast also tends to be better and the way the lens deals with highlights improves. I have noticed reds really pop out on Canon lenses, whereas Zeiss have a slightly colder, clinical look to them, which I quite like. Leica tend to produce a beautiful buttery smoothness in the out of focus bokeh, which I am also a fan of.
With lenses you need to pay a huge amount of extra cash, to get a small increase in the quality of the image. Another thing to note here is that in many situations that extra money won't show. If the lens is stopped down and the lighting is very controlled, there often isn't much to choose between two lenses, even though they maybe hundreds of dollars apart. However, open those lenses up and film in some more unusual lighting conditions and the more expensive lens with likely start to shine.
The video below, as unscientific as it is, shows how the 125 dollar Canon compares to the 20k Arri Master Prime.
Before you rush out and buy a Canon 1.8f, remember that this video doesn't really show much of the Master Prime. Go and watch The Danish Girl at the Cinema, which was shot on Master Primes, it looks unbelivable. Much of it looks like it was shot wide open at T1.3. It's also worth noting that Fstop and Tstop measurements are not the same. F stop is relative to the size of the lens, Tstop is not. So the T stop in most cases will be much faster than the Fstop equivalent.
Another thing to say here is, I have only once seen what I have shot projecting on to a cinema screen, but it's a humbling experience. Every details is really visible when you are looking at a giant screen. I suspect if you were to watch this lens test at your local cinema, instead of on your iPad, you would start notice a few more details.
Unlike cameras, lenses don't seem to loose much value over time, so it makes sense to spend a bit more money on lenses if you can afford to. If you are shooting with a small crew and always pull focus for yourself you can probably get away with stills lenses. If you can afford to do so, it is well worth getting something at the top of this range, from Leica or Zeiss who make stills lenses with metal housings, large focus throws and in some cases external irises. If you can't afford this, then go for something like the Canon 1.4f or similar.
The video below is from Shane Hurlbut's crew and it compares Canon L, Leica R and Zeiss CP2s
There is also a really in depth lens comparison here, which looks at Ziess CP2s, Ziess Super Speeds, Canon CN-E and Leica Sumilux Cs amoung others.
In the cine lens range it really depends on the work you are getting and your ability to get your lenses onto a job. If you buy a set of Zeiss lenses and then a director says they really want to shoot with Cooke, you'll end up having to rent. If you really love the look of a certain lens and can persuade any director that they are absolutely the best lenses for the job, then the investment could well pay off.
Don't be put off by pixel peepers and geeks on forums. Buy the lenses that you can afford and which have the look that you like. A lot of it is subjective anyway, some like the Leica look, others hate it, some like ziess, some don't. Few lenses are perfect and you are always going to get a certain amount of breathing, distortion and other flaws (unless Master Primes are in your budget).
Buying a set of primes could easily cost as much as your camera, but on the plus side they will certainly out live it by many many years.